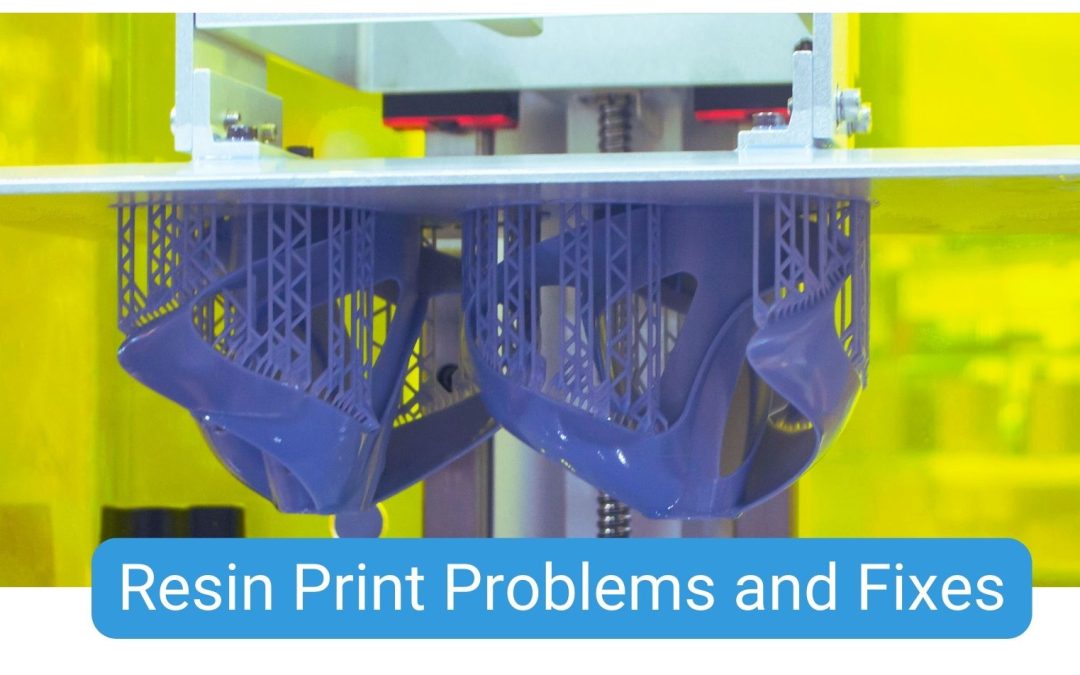
| Print stuck to print bed |
- Advanced guide here: Print stuck to build plate? Here’s the fix
- Apply force with metal scraper beneath model, gradually going from corner to corner
- You can try heating the plate if the print is especially stuck, using a hairdryer. Thermal expansion can help lift the print more easily.
- Consider flexible build plates like these for easier removal
- Reduce bottom exposure time (start in increments of -5 to -10)
- Re-level your print bed. Follow the manufacturer instructions carefully. Check plate is securely screwed after leveling.
- Test your revised settings or changes with small prints first.
|
| Print not sticking to print bed or prints sticking to FEP film (the resin tray) |
- Re-level your print bed. Follow the manufacturer instructions carefully. Check plate is tightly screwed after levelling.
- Confirm your resin tray is tightly screwed in and secured to the printer – loose screws can result in the tray being suctioned up out of place by the print bed.
- Confirm you are using the correct resin settings for your resin type and colour. Are you printing transparent or ABS-like resin? These all use different setting parameters. See this guide to printing basic, standard grey resin: How to print your first resin 3D model . There’s a guide on printing transparent resin here.
- Increase bottom exposure time. Start with your manufacturer’s recommended settings. If the issue persists, increase the bottom layer exposure time by 10-15 seconds. For your reference, the typical range for bottom layers is around 25-40 seconds.
- Increase the count of your bottom layers. You can default to 6-8 bottom layers, but go up to 8-10 for heavier prints.
- Try thoroughly cleaning your build plate. Use Isopropyl alcohol or IPA (99% or higher) to remove all residue.
- You can try applying dry PTFE lubricant like this one. They are often out of stock in Australia, but you can try Bunnings or simply order through Amazon AU where it may ship from the US.
- If all else fails, you could have a FEP film issue. The FEP is a consumable. Consider replacing your FEP.
|
| Supports printing, but no model printing on it |
- Adjust the support density, as they may be too weak to hold the model. Add more medium supports, avoid light supports and consider adding heavy supports in select larger areas. Even professionally pre-supported miniatures can fail, so increasing support strength can often resolve this.
- Ensure your supports are effectively clustered and in the correct spots to support the model. On your slicing software, in the ‘Prepare’ section on Lychee, you can find a slider on the righthand side that you can slide up and down to see how the printer will print the file. This can help you spot any unsupported overhangs or poorly supported areas.
- Make sure you add a raft, and don’t just rely on the clustered supports.
- Try increasing the support contact depth
- Ensure your model is optimally angled. The default automated orientation tools like Lychee performs are not flawless. You can play with the angle and automatic supports to see which seems the most stable. Generally the model should be angled around 30-45 degrees.
|
| Prints malformed or missing limbs or pieces |
- Ensure your supports are effectively clustered and in the correct spots to support the model. On your slicing software, in the ‘Prepare’ section on Lychee, you can find a slider on the righthand side that you can slide up and down to see how the printer will print the file. This can help you spot any unsupported overhangs or poorly supported areas.
- Especially for the offending area – check there are no unsupported or insufficiently supported overhangs. On your slicing software, in the ‘Prepare’ section on Lychee, you can find a slider on the righthand side that you can slide up and down to see how the printer will print the file. This can help you spot any unsupported overhangs or poorly supported areas.
|
| Printer can’t find or won’t accept 3D print files |
- Make sure your file is in the right format. Although you’ll receive your 3D print files as .STL or .OBJ, this isn’t necessarily the format your printer accepts. Files need to be sliced and will generally need to be .ctb or .pwmx. For example, Elegoo uses .ctb and Anycubic uses .pwmx. Check your printer’s specific file compatibility instructions if you’re unsure. If you don’t know what a slicer is, read this: How to print your first resin file.
- Redownload or try a different STL file to ensure the file isn’t corrupt, especially if you’ve downloaded it online. This isn’t common but is known to happen.
- You can try re-slicing and re-copying the model over to minimise the chance it was file corruption at this stage.
- If you suspect there is an issue with the model’s structural integrity itself such as having holes or thin areas, you can try tools like Meshmixer to repair them.
- Try a smaller USB. Some machines can only handle sizes under 32 GB, sometimes lower. I’ve stuck to under 8 GB where possible.
- Try a different USB drive. You can also try reformatting your USB to FAT32.
- Clean your USB ports to rule this out.
- As a last resort, you can update to the latest firmware. This is good to do, but may result in challenges for beginners. Make sure you use a guide.
|
| Warping – especially for bases or models with flat areas |
- Increase supports and decrease the distance between supports
- Reduce the lift speed to slow its descent and try to minimise variance in layers, and decrease your layer thickness. This will make prints take longer, but hopefully reduce warping on flatter models.
- Calibrate your printer. There are separate guides for this available online.
|
| Bottom layers expanded or bulging (Elephant’s foot) |
- Increase the distance/lift between the build plate and first layer slightly, or reduce first-layer exposure time
- Add a raft or reduce bottom layer count/exposure to minimize light bleed at the base
- Ensure the build plate is properly leveled (uneven leveling causes excess squeeze-out at the base)
|
| Model cracks during cleaning or over time (Resin trap) |
- Add drainage holes to hollow sections to release trapped uncured resin
- Reorient the model to avoid enclosed cavities where resin can pool
- Ensure hollowed models are properly vented (one hole isn’t enough – add an air hole opposite the drain hole
|
| Rough surface finish or strange texture |
- Check for expired or contaminated resin and filter before use
- Clean the FEP film/vat floor of debris or cured resin residue
- Reduce layer height for finer detail and smoother finish
|
| Brittle prints or weak parts |
- Ensure full post-cure under UV light for the recommended time (under-curing causes brittleness)
- Avoid over-curing, which can also make parts brittle over time
- Check resin type – standard resins are inherently more brittle than tough/ABS-like resins for functional parts
|
| Missing details on one side or prints sticking on only one side of the build plate |
- Re-level the build plate (uneven leveling causes inconsistent adhesion/detail across the plate)
- Check for a warped or unevenly tensioned FEP film causing inconsistent light exposure
- Clean the LCD/light source screen for dust or residue causing partial curing
|
| Model only printing halfway or other large flat or “unprinted” areas |
- Check resin levels – printer may have run out of resin mid-print
- Inspect FEP film for damage/tears that could let resin leak away from the print area
- Verify the light source (LCD/LED array) isn’t malfunctioning or has dead zones
|
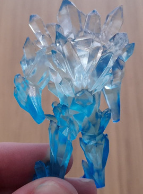
| Issues with clear resin, including print failures, sticky prints and yellowing |
- Store clear resin away from UV/sunlight exposure to prevent premature curing and yellowing
- Extend post-cure time slightly, as clear resin often needs longer to fully cure and lose tackiness
- Use a UV-blocking storage container and keep vat covered between prints to reduce ambient light exposure
- To prevent yellowing, you can use a transparent varnish to help with sun resistance, though you still need to keep it away from direct sunlight
|