Average read time: 13 mins 30 secs
FDM printers are the easiest 3D printer to get into a home setting because they don’t require any particular storage conditions or too many safety precautions.
That said, here is everything you need to understand FDM printers, printing and whether it’s the right choice for your hobby projects.
What is an FDM Printer?
For the average household user, hobbyist, or miniatures enthusiast, an FDM printer is your low-cost solution to printing incredibly durable terrain, household knick knacks, toys, cosplay props and even car parts. While they can also be used to print miniatures such as characters and creatures, this is less their strength than it is that of resin 3D printers.
The technical answer is that FDM stands for Fused Deposition Modelling. It uses a technique designed to produce high-performance 3D printed and fabricated thermoplastic parts using high-quality CAD software.
Either way, FDM 3D printers bring plastic to its melting point, extrude it through a nozzle layer by layer onto a print bed, and in the end, those layers solidify as they cool to form a complete 3D printed model out of hardened plastic.
FDM Diagram: The Anatomy of an FDM 3D Printer
Here’s an image you might want to save for later. As you navigate your FDM 3D printer, knowing these terms will become more and more useful as you attempt to upgrade and troubleshoot.
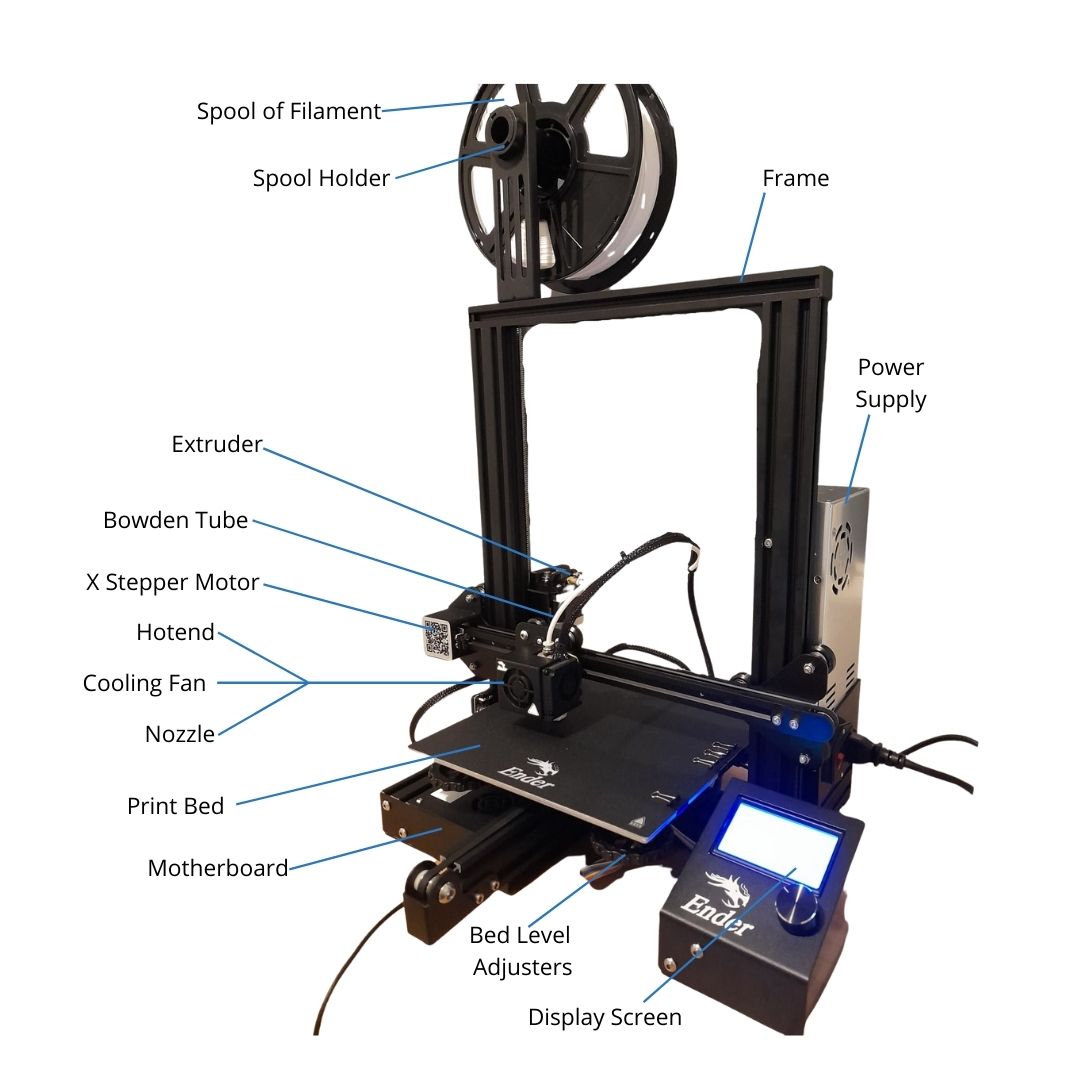
Fused deposition modelling (or FDM) requires a few key components, namely:
- Extruder
- Frame
- Bowden Tube
- Cooling Fan
- Print Bed
- Motherboard
- Power Supply
- Nozzle
- Hotend
- Spool Holder
- X Stepper Motor
- Y Stepper Motor
- Z Stepper Motor
Software Needed for FDM 3D Printers
All 3D printers require 3D printed files to be sliced so that they can implement printing them one layer at a time. For FDM, I recommend you use the free slicing software known as Cura.
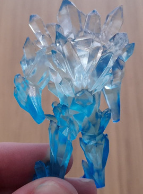
Slicing refers to taking a 3D printing file, such as an STL, and preparing it for printing by “slicing” the file into multiple hairline layers. So while we see a 3D print file like the first image, an FDM 3D printer needs to see it a bit like the second image (only much finer). That way it can extrude the model one layer at a time.


The first picture is how we see a model, the second picture is how the printer sees it.
P.S. This guide covers FDM 3D printers – which are great for household knick-knacks, terrain, vehicles, Cosplay or other props). For the resin 3D printers guide, head over here:
Or to learn the differences between FDM and resin 3D printers more in depth, see the FDM versus resin printer guide.
At the time of slicing, you will most likely alter settings according to your material properties and machine build volume.
Importantly, you will also need to ensure your 3D printing file is adequately supported where necessary. These support structures can be auto-generated by Cura, but in time you may choose to manually support them to save materials and ensure the supports are easier to pry off the model as part of post-processing.
If it sounds confusing now, don’t worry. The FDM process is relatively straightforward and will become second nature in no time. Just ensure your print fits the build volume (also known as the print bed) and auto-generate your supports to start, and you’ll be fine.
You can set the build volume by selecting from a dropdown list of 3D printers on Cura, so you don’t need to know your specific 3D printer’s precise dimensions.
What Are FDM 3D Printers Best For?
FDM technology can produce more robust parts, and is best suited for simpler parts. These 3D printers also excel at printing clean or straight angles, making them ideal for terrain, small houses, miniature vehicles or ships, miniature furniture, car parts, cosplay props, household parts, educational designs, simple tool creation, and other uniquely suited applications such as articulated creations (for example, a snake with multiple joints that can “move”).
Examples of FDM 3D Prints
Take a look at some of my example FDM prints below. These were all done on a Creality Ender 3. The FDM printed parts include the ship, the movement tray, the entire train and the bases beneath the resin printed spearman.

How Much Does an FDM 3D Printer Cost in Australia?
Anywhere from $250 AUD to over $2000 AUD.
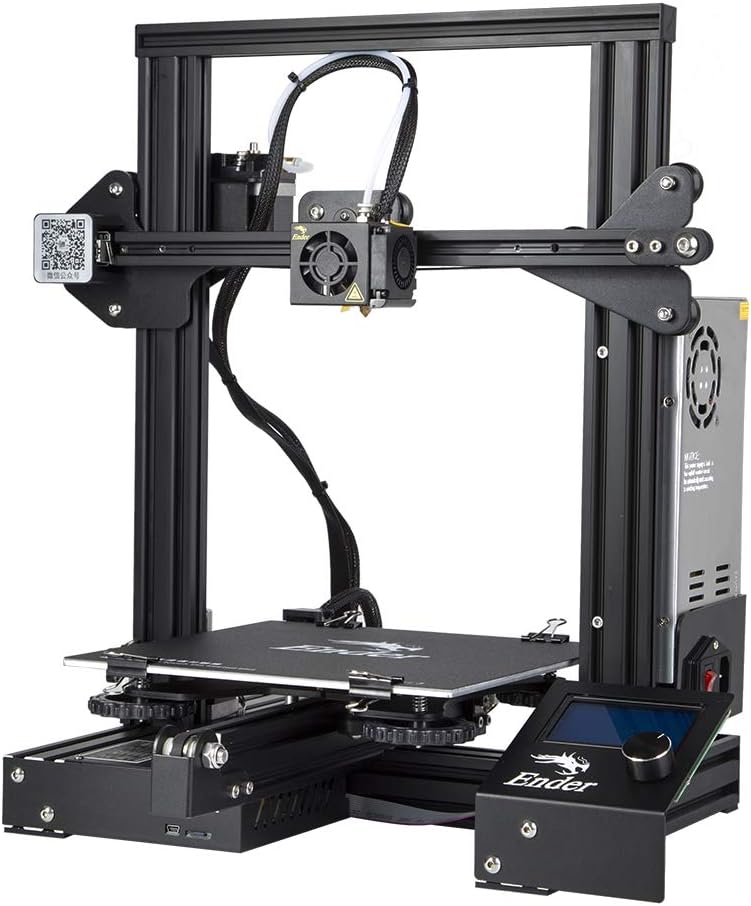
You can get started with one of the best FDM 3D printers on the market for $250 AUD – that being the Creality Ender 3. By “best”, I mean one of the longest standing FDMs with one of the largest active communities around it, which means you’ll have an easier time sourcing help online.
The best budget FDM 3D printers according to sales and reviews – and for what it’s worth, my personal experience – are definitely Creality and Voxelab. You won’t feel shorted with these models once you do grow out of the beginner phase as they’re very versatile.
If your budget for your first (or next) FDM 3D printer is on the high-end, then look into Bambu 3D printers. These are some of the smoothest printers on the market.
| BEST CHOICE | FDM PRINTER | FEATURES |
| Top Pick | Bambu Lab A1 Amazon |
Plug and play, fantastic results, and tons of great features like printing in multi-colour (with upgrades) |
|---|---|---|
| Budget Pick | Creality Ender 3 Amazon |
Lowest cost, huge online community for troubleshooting, perfectly fine for beginners |
| Tentative Beginners | Flashforge Adventurer 3C Amazon |
No assembly, low cost entry point to gauge your interest, though on the smaller side |
| For Kids | Flashforge Adventurer 3C Amazon |
No assembly, ready to go out the box, low to mid cost, safety enclosure |
| For Schools | i3 MK3S+ Official Site |
Most reliable |
| Ease of Use | Ender 3 S1 Pro Amazon | Fuss-free, though most Flashforge and Prusa makes work too |
| Size Matters | Kobra Max eBay | Colossal build volume, minimal assembly |
| Tinkerer’s Pick | Ender 3 S1 Pro Amazon | Highly customisable, laser engraving compatible with upgrade |
| Dual Extrudes | Bambu P1S or Flashforge Dreamer Amazon |
The Flashforge Dreamer dual-extrudes for two different colours out the box, note this is an advanced skill |
| Best Results | i3 MK3S+ Official Site |
Among the highest-quality machines with a price to match |
| BEST CHOICE | FDM PRINTER |
| Top Pick | Bambu Lab A1 Plug and play, fantastic results, and tons of great features like printing in multi-colour (with upgrades)
|
|---|---|
| Budget Pick | Creality Ender 3 Lowest cost, huge online community for troubleshooting, perfectly fine for beginners
|
| Tentative Beginners | Flashforge Adventurer 3C No assembly, low cost entry point to gauge your interest, though on the smaller side
|
| For Kids | Flashforge Adventurer 3C No assembly, ready to go out the box, low to mid cost, safety enclosure
|
| For Schools | i3 MK3S+ Most reliable
|
| Ease of Use |
Ender 3 S1 Pro Amazon Fuss-free, though most Bambu, Flashforge and Prusa makes work too
|
| Size Matters |
Kobra Max eBay Colossal build volume, minimal assembly
|
| Tinkerer’s Pick |
Ender 3 S1 Pro Amazon Highly customisable, laser engraving compatible with upgrade
|
| Dual Extrudes | Bambu range or Flashforge Dreamer Dual-extrudes for two different colours out the box, note this is an advanced skill
|
| Best Results | i3 MK3S+ Among the highest-quality machines with a price to match
|
Entry-Level FDM Printers:
Budget-Pick
Comgrow Creality Ender 3:
Roughly AUD $250
My first FDM, and the ultimate budget pick. This is a well-loved beginner FDM with plenty of resources online to assist you with troubleshooting (you can start with the community on Reddit). While I loved every minute, keep in mind it took around 2-3 hours to setup and has a slightly steeper learning curve than some of its more automated successors. You’re trading ease of use for dollar savings.

Beginner’s Pick
Bambu Lab A1:
Roughly AUD $670 – $900
If you have the budget, go for the Bambu. Bambu offers plug and play with no need for setup and erases a lot of the little learning curves with upgrades like automated bed-levelling. Finally – it can be upgraded to allow you to print in multicolour! It makes FDM almost as easy as resin 3D printers.
Or go for the Mini version:
Top Pick
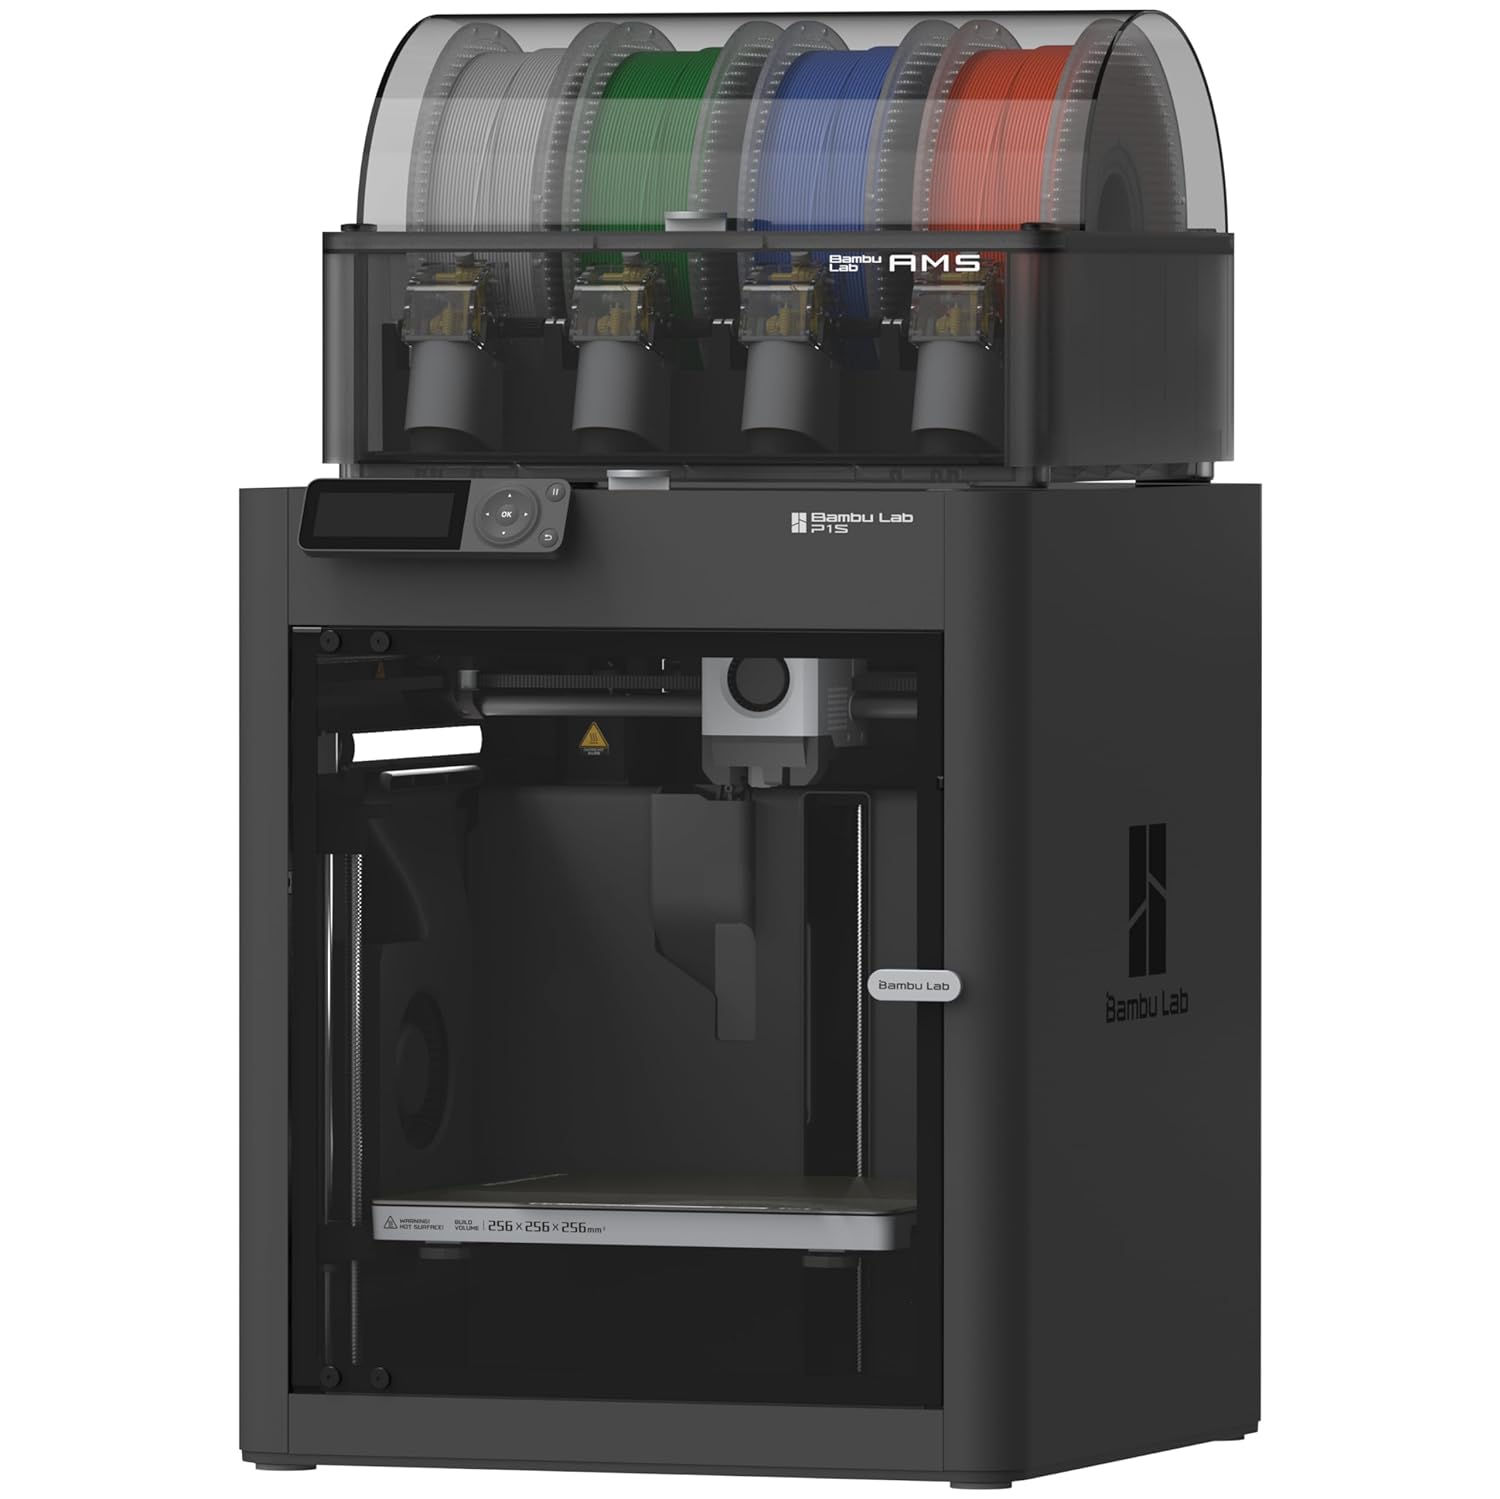
Bambu Lab PS1 + AMS:
Roughly AUD $1100 + $400
Probably a steep investment if you’re just starting out with FDM printing, but this is the dream machine. It dual extrudes in up to 4 colours as long you splurge for the AMS, and it’s also more convenient to keep multiple rolls of filament on the printer. You can also get the AMS at a later stage to stagger your payments.
Do FDM 3D Printers Need Assembly?
It’s worth noting that with many of the go-to FDM machines, you’ll have to dedicate an hour or two to building it yourself as the kits tend to come semi-assembled.
While not difficult, it’s worth watching a few YouTube videos and studying the manual, and it does mean there are approximately two hours between yourself and hitting go on your next print. The benefit is that you get to see how all the parts come together beforehand, which can help you get familiar with your printer for troubleshooting purposes later down the line.
And while it’s not as tedious as it sounds, if you really hate the thought of sub-assembling your 3D printer yourself, look into Anycubic’s range of FDM 3D printers. The Anycubic Kobra and the newly released Anycubic Kobra Max come 95% pre-assembled – and the Kobra Max has one of the biggest build plates of all time at an incredible 400x400x450mm. For comparison, the standard FDM 3D printer is around 220x220x250mm. The Kobra Max is currently a more elite model at around $850 AUD.
How Does FDM 3D Printing Work?
An FDM 3D printer deposits filament layer by layer onto a build platform until you’re left with a complete 3D model. An FDM uses the digital designs we as users input and converts these into physical dimensions. FDM technology boasts incredible dimensional accuracy, and is quite a sight to behold. Typically, FDM material consist of polymers like ABS, PLA PETG, and PEI, which are fed through an extrusion nozzle.
To run an FDM machine, spools of thermoplastic filaments are loaded into the printer, where they pass through the extruder, a bowden tube, a hotend and a nozzle, in order to be melted and deposited onto the print bed.
When the hotend and subsequently the filament has reached the desired temperature, the printer feeds the filament to the extrusion head or nozzle. These extrusion heads are installed onto a triangular system that can move across the three axes – allowing the FDM printer to move back and forth across these axes in order to “construct” the desired 3D model.
Post-processing for FDM 3D printing
FDM prints leave the print bed at enough high quality, although there are optional post-processing methods to eke out the best of them. These include sanding, polishing, priming and painting, and even welding, in order to obtain a smooth surface finish.
The primary aftercare for FDM prints will be to tend to any stringing that may have occurred during the print – which while possible to minimise, is oftentimes tricky to avoid entirely. This simply requires snipping and trimming any rogue filament threads.
Other FDM Essentials
Expenses to consider beyond the 3D printer are minimal for FDM, but include the following.
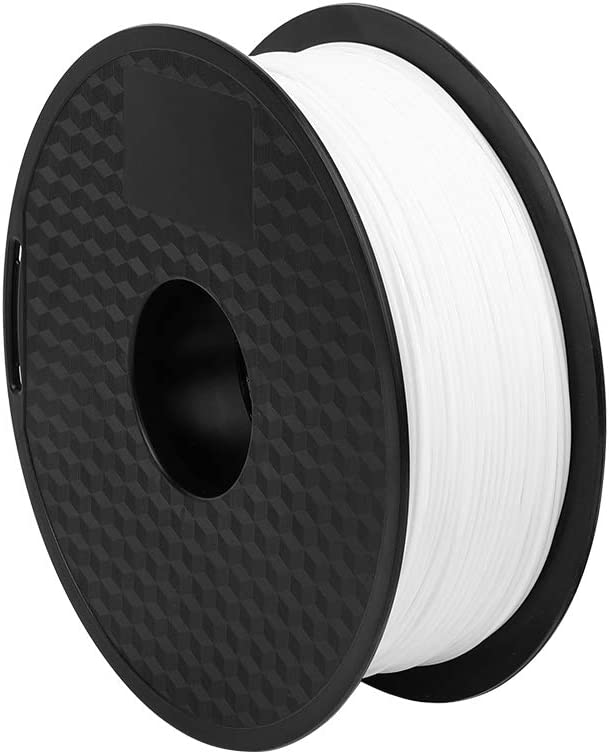
1. Filament Spools
This is the material the FDM printer uses. While there are several types, you should really start with some basic PLA.
White PLA:
Black PLA:
2. Replacement Parts
Given its many functional parts, replacements with an FDM are inevitable, especially if you have a tendency to tinker like I do. In my experience, most replacement parts have been inexpensive. Examples include a clogged nozzle or a jammed bowden tube.
3. Tools
Upfront costs may also include a few minor tools depending on which FDM printer you buy, such as scrapers for lifting the print off the bed. The vast majority come pre-supplied with such items.
4. Adherents for the Print Bed
The primary consumable many FDM printers use are an adherent like glue sticks or hairspray, which can help the print layers adhere to the bed. You do have other options, such as upgrading to glass, but a glue stick will go a long way.
5. Cleaning Supplies
Finally, you may want to look into acetone (or nail polish remover), which can be used to melt down excess melted plastic in order to clean parts of your printer.
To summarise, the average FDM consumables upkeep in Australia will look as follows:
FDM filament – $30 AUD per 1KG spool
Glue stick – $2-$5 per pack
Replacement FDM parts – It depends on what you break. Some parts are available for next to nothing.
Finding FDM 3D Printing Files
There is no shortage of options for finding free 3D print files. We offer several free 3D print files on this site that we aim to update regularly. But there are easier ways than going site to site, as there are several sites that specialise in hosting 3D print files, and they all have active communities. These include:
Other options for finding 3D print files include:
I also have my own free STLs available here.
Is FDM Printing Safe?
FDM printing is perfectly safe. Unlike with liquid resin, FDM printer materials are not in themselves toxic and require no additional steps to “cure” the prints to ensure they are safe to handle.
This means no gloves, no masks, no alcohol and no UV light are needed for FDM printing over resin 3D printing, saving a considerable amount of table space.
The only precautions necessary with FDM 3D printers, aside from the usual caveats of operating technology, surround the hotend. As mentioned, an FDM printer works by melting down filament in order to extrude it, and naturally this requires a good deal of heat. The typical melting temperature for PLA is 200 °C, and a filament like ABS can reach 250 °C due to its heat-resistant nature. Even more robust filaments, like carbon fibre filament, can require temperatures in excess of 300 °C.
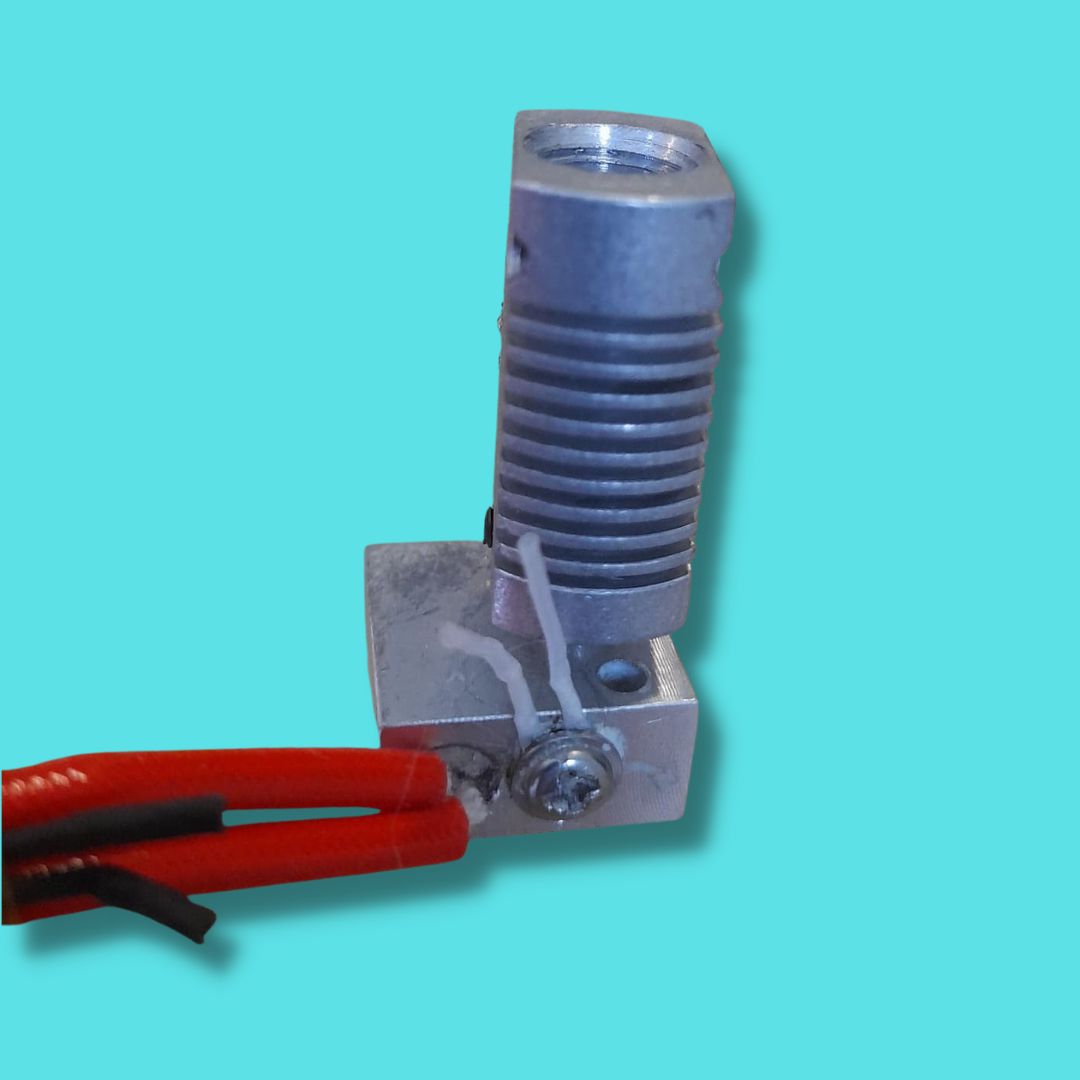
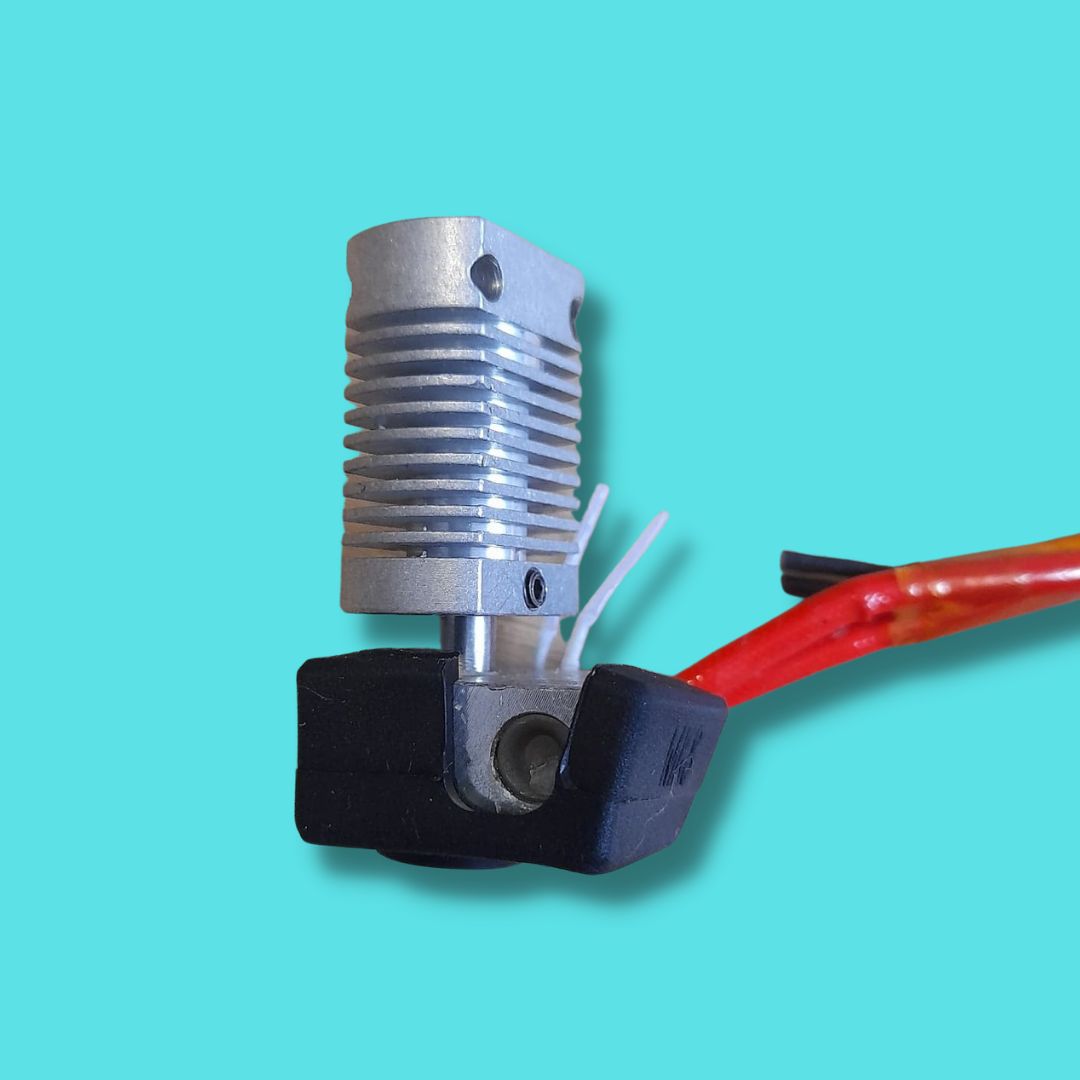
FDM Printer Parts That Heat Up
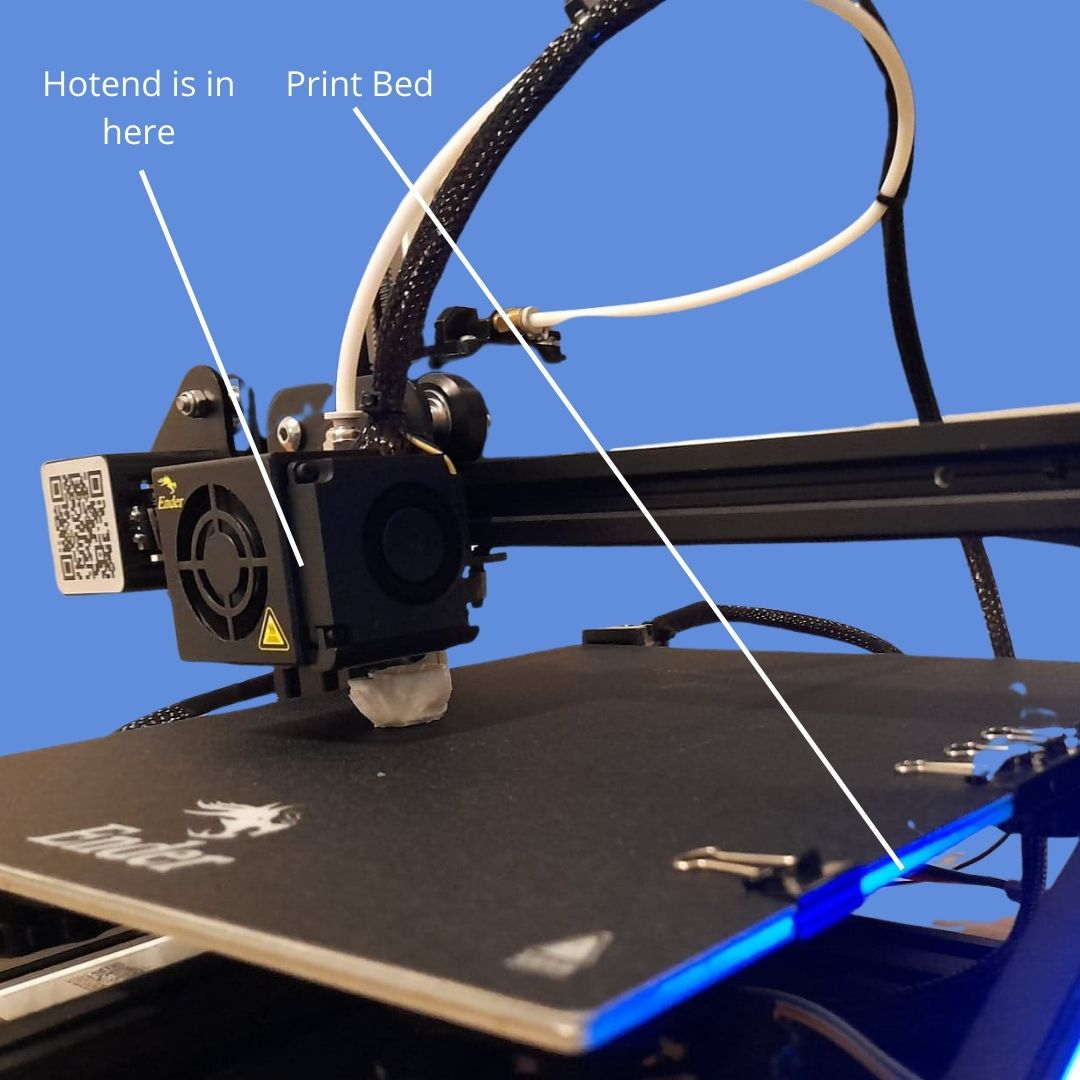
There are two components that heat up – the hotend and the print bed. The print bed is generally set to a much milder temperature and isn’t much of an issue. You don’t want to directly touch the hotend, however, and should exercise caution when applying metal tools directly to the hotend shortly after it’s been heated, as this is the part that reaches over 200°C.
Where is the hotend located? At the point where the filament extrudes, ensconced by a little black box with a cooling fan. You can see it in the images below.
As you’ll notice, the hotend is within its own black box, making it unlikely you’ll bump into it unless you’re reaching your hand underneath this container. And even then, the hotend is fitted into a rubber sleeve of sorts, to help mitigate the chance you accidentally touch it.
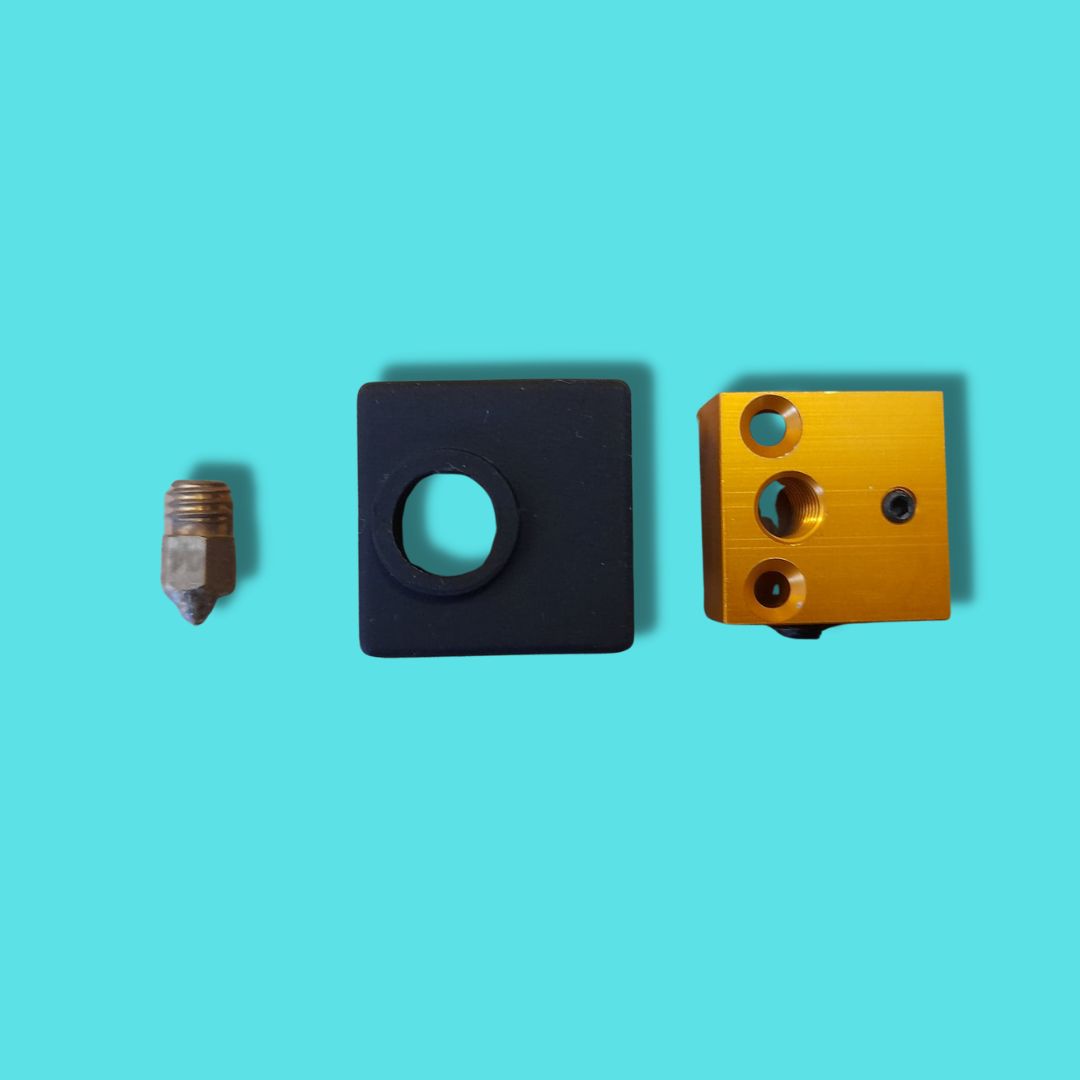
ABOVE: From left to right: a nozzle, a hotend protector and a hotend. Filament feeds through all three. Left is a hotend as it would be installed on your FDM.
The hotend and print bed are the parts of an FDM that get hot.
Are There FDM Printer Fumes?
Unlike resin 3D printing, FDM printing does not result in harmful fumes. However, while the most common FDM material type – known as PLA filament – is perfectly safe to breathe in, there are other filament types that warrant greater caution.
ABS filament, for instance, may be a respiratory irritant. And while it isn’t deemed harmful by authorities on the subject, it does smell repugnant to most people.
Ultimately, it is always better to take the precaution of operating any FDM 3D printing in a well-ventilated space.
FDM Filament Types:
There is a massive range of filament and FDM materials that you can print with, opening up a vault of creative potential.
So much so that I dedicated an entire article to all the most common and unique filament types here: 3D Printer Filament. You can find each filament type’s best use cases and melting points over there as well.
Here is a quick overview of the 3D printer filament you can use on FDM printer:
- PLA Filament (Polylactic Acid)
- ABS Filament (Acrylonitrile Butadiene Styrene)
- PETG Filament (Polyethylene Terephthalate Glycol)
- Silk PLA+ Filament
- PVA Filament (PolyVinyl Alcohol)
- ASA Filament (Acrylonitrile Styrene Acrylate)
- Carbon Fibre Filament
- Nylon Filament
- TPU Filament (Thermoplastic Polyurethane) or Flex Filament
Some unique filament types also let you emulate a variety of other non-plastic materials. These include:
- Wooden Filament
- Stone Filament
- Marble Filament
- Rainbow Filament
- Glow-in-the-Dark Filament
- Gold Filament
- Foam Filament
- Flexible Filament
Pros and Cons of FDM Printers
Broadly speaking, an FDM 3D printer boasts a straightforward printing process, high quality prints and durable materials.
Pros:
- Generally larger construction volume than resin printers
- Easy to operate
- Filament is a very low cost material (typically $30 AUD)
- Diverse range of thermoplastic materials available, including materials with key characteristics such as chemical resistance and heat resistance
- Materials are non-toxic, unlike liquid resin
- More room to tinker
- Little to no post-processing on FDM prints
- FDM parts for replacements are mostly low-cost
- Best choice for 3D printing terrain, vehicles, household parts and educational designs
Cons:
- These 3D printers struggle to print finer details, making them ill-suited for tiny miniatures
- Slightly more functional parts and in turn maintenance than a resin printer
- Less smooth surfaces on FDM prints and slightly visible layer lines, making it less suitable for painting
- Nosier than an SLA printer
- Potentially slower than resin printing
- Not the best choice for printing tiny, fragile or detailed miniatures such as those for tabeltop games
3D Printers That Dual-Extrude
Some FDMs dual extrude, allowing you to print two different types of materials at once and capitalise on their individual properties. You can read more about this here.
One big advantage of FDMs that dual extrude is the potential to create water soluble supports by combining filaments like PVA with more common FDM materials such as PLA.
There are few things more satisfying than immersing your prints in water and having the supports dissolve themselves away, instead of having to carefully pick and cut them loose.
Dual extrusion printers will also allow you to print multi material objects in different colours, or reinforce the structural integrity of models by lacing them with stronger FDM filaments. Some common reinforcer filaments include ABS and carbon fibre.
What About FDM Printers for Businesses?
FDM provides rapid and economical manufacturing solutions for prototypes. There is such a diverse range of filament types, that FDM is widely used for prototyping parts before full-fledged manufacturing occurs.
However, these FDM printers are generally different to household 3D printers in their scale and capacities. While small businesses such as Etsy stores could stand to benefit from desktop machines, anything larger is better off looking into industrial FDM printers.
Which FDM Printers are Best for Schools?
FDM 3D printers are actually a common choice for schools who want to bring in 3D printing technology. Despite some heated parts, they ultimately require a lot fewer safety precautions than resin 3D printers. This is primarily because resin is toxic, and FDM filament is not. Additionally, FDM printers can be easily stored, while resin printers require environmental conditions such as darkness and ventilation.
A popular FDM brand for educational institutions is the Prusa line. Whereas all FDMs can be temperamental due to their mechanical nature and many small moving parts, Prusa FDMs are some of the most reliable on the market. For revolving door usage between several students, and for the sake of mitigating the risks of clogging, breakdowns and other stop-and-gos, I would recommend a higher price point machine like Prusa any day. Budget FDMs will be nothing but a headache in an educational setting, even right up until university level. The learning curve for an FDM means you want a forgiving machine in this setting.
Is There a Difference Between Desktop and Industrial FDM Printers?
An FDM printer generally falls under one of two categories: the industrial type or the desktop type (which are typically for home use). Aside from a handful of features, the key differentiating factor is the scale of production.
Industrial 3D printers are considerably more expensive than their desktop counterparts. As industrial machines are more effective and powerful than desktop FDM 3D printers, they can be applied to a wider range of tools, functional prototypes and end-use parts.
Applications and Industries
You’d be surprised at how many industries have adopted the use of 3D printing for prototyping and even final products.
Just last year, the world’s first 3D bollard was printed – designed to moor ships at a port! Port officials were quoted as saying that the, “new bollards are of at least the same quality as cast steel ones”. The technology behind these was, while wildly more expensive, ultimately using the same core concepts as your home FDM printer.
Professional FDM printers and other 3D printing, including laser cutting, are on the rise for both end-use products and rapid prototyping. Their adoption in retail and industrial environments is growing rapidly worldwide – with the total global 3D printed product market expected to exceed 20 billion by 2022.
Industries currently utilising 3D printers include:
- Construction
- Aerospace
- Automotive
- Manufacturing
- Robotics
- Education
- Health
How Fast Does an FDM Print?
The printing process can be slow. Expect a large construction such as a 3D printed miniatures-scale house to stretch over 1-2 days.
The overall print speed can be adjusted by altering nozzle diameters, buying an FDM 3D printer with a larger build volume, and adjusting aspects such as the minimum layer height, but ultimately, you might compromise quality prints for shaving off a couple of hours. I always recommend you play around with your printer settings to determine the speed to quality ratio that works for you.
Another key aspect to shortening print times is learning how to properly implement support structures. Both FDM 3D printers and resin 3D printers require support structures on their models, and while automatically generated supports are possible using printing software such as Cura, it is often imperfect and wastes a lot of printing materials.
Can an FDM Print Miniatures?
Can an FDM 3D printer be used to print miniature creatures and humanesque characters? Absolutely. But if this is your primary ambition for getting a 3D printer, I would honestly opt for a resin 3D printer instead.
FDM printers struggle with fine details, which will make getting aspects such as facial features difficult at minute, tabletop miniature scales. An FDM 3D printer can get the texture of wood on a ship or even quite intricate vine-like patterns without issue, but their results on tiny miniatures just won’t compare to resin.
Where you can get away with FDM printer miniatures is if the models themselves are quite large – this will make the model’s details less finicky. Though even then, supporting such models is best when the parts are less intricate or fragile on an FDM 3D printer.
Personally, I use my FDM for printing all my terrain and vehicle miniatures, as well as odd projects like dice towers or board game pieces. I have also been able to simply print objects I’d find convenient around the house, such as a headphone holder or Wi-Fi sign.
I stick with my resin 3D printer for miniatures.