Average read time: 12 mins 20 secs
This article has been updated for 2025.
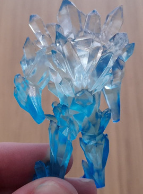
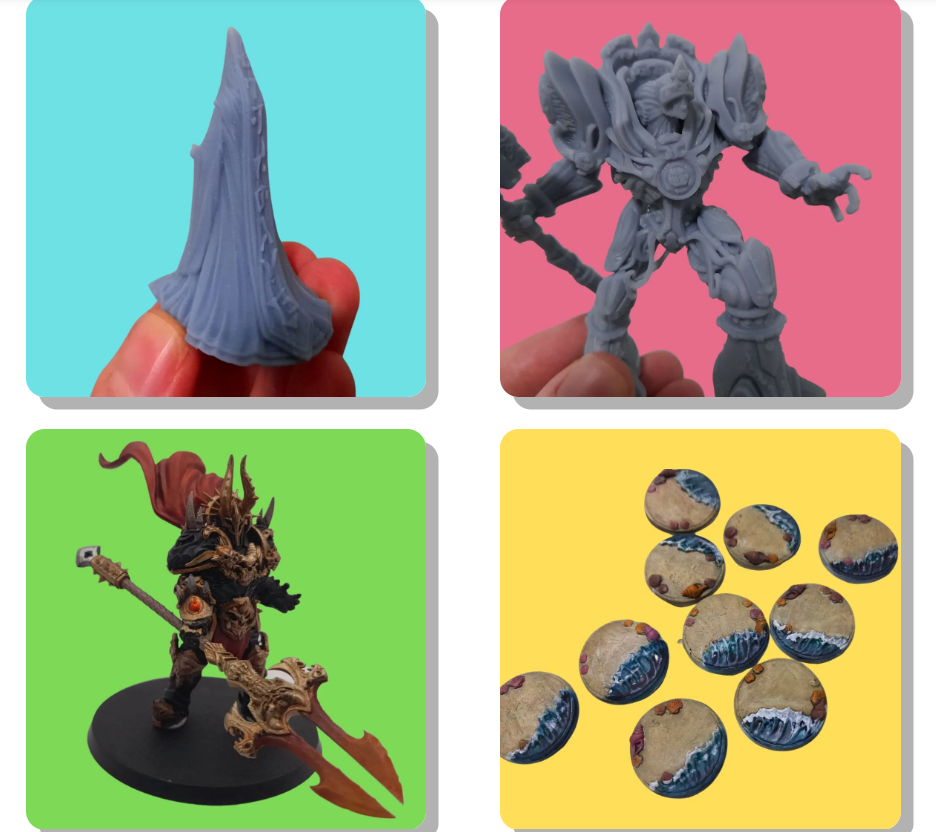
Everything you need to know to get started with resin 3D printing in Australia, and start printing things like this:
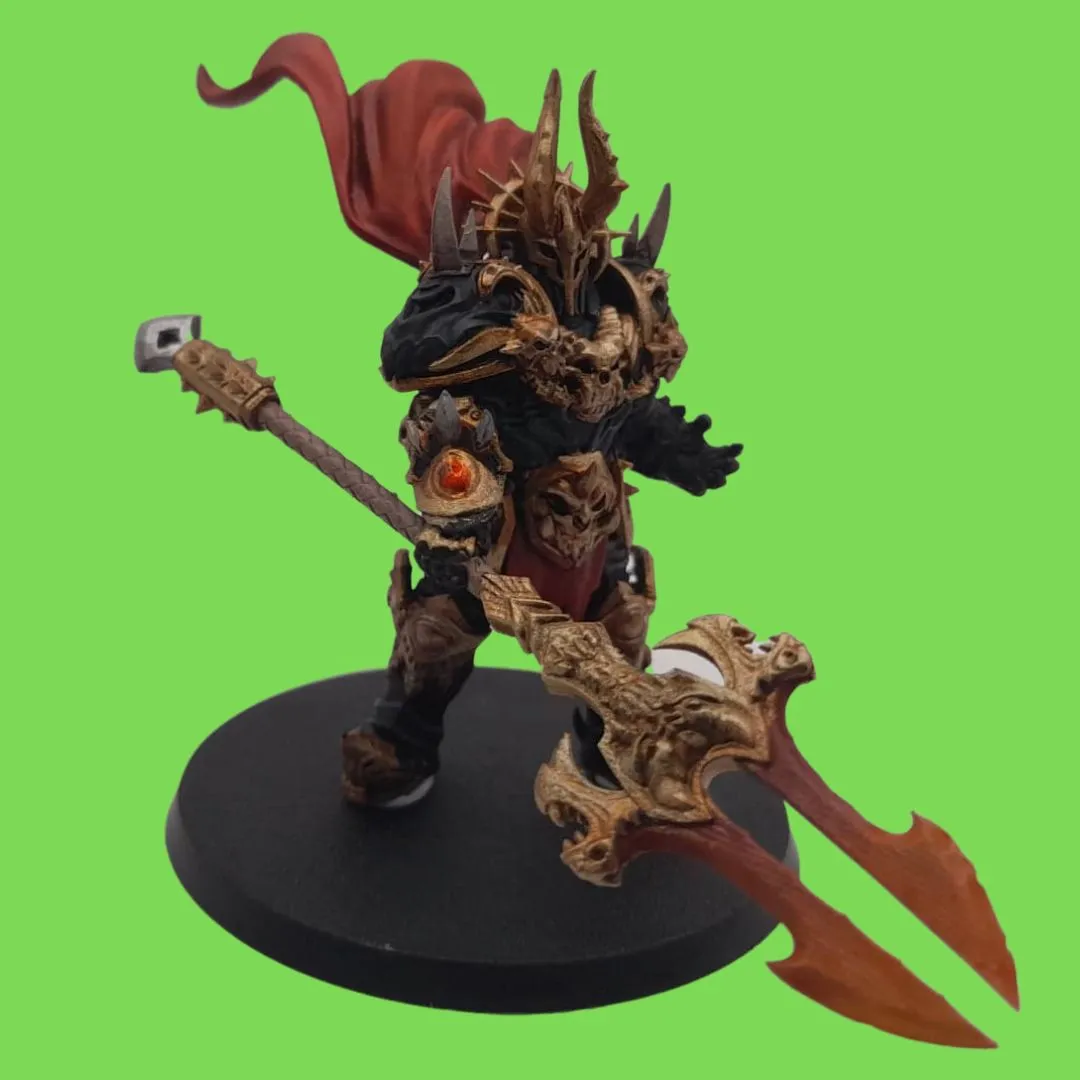
Above: Both of these are models I’ve resin-printed, primed and then painted. Personally I use them for tabeltop games.
P.S. This guide covers resin 3D printers – which are going to be the preferred choice for most beginners because of their relative ease of use, and the fact that they are best for detailed miniatures such as figurines, paintable and display models, proxies for tabletop games, and can also handle some terrain and vehicle prints. For the FDM printer guide (the printer best for household knick-knacks, terrain, vehicles, Cosplay or other props), head over here:
Or to learn the differences between FDM and resin 3D printers more in depth, see the FDM versus resin printer guide.
So…what is a resin 3D printer?
Resin 3D printers utilise flashes of UV light to solidify resin, one layer at a time, until they form a complete 3D model. It’s made possible by the fact that uncured resin hardens when exposed to UV light, and all resin 3D printers utilise a series of flashes of UV light in a pattern to manipulate how the resin cures, layer by layer, ultimately forming a whole model.
The process allows for incredibly finely detailed models, even at rather small scales. To give you an idea, while the average FDM printer can achieve average layer heights of 0.05mm-0.1mm, resin 3D printers can print heights as low as 0.01mm-0.25mm. This generally makes it the ideal choice for printing miniatures such as for tabletop games like D&D or Warhammer, as well as painting projects such as large collectibles or busts – the fine layer lines generally mean printing layer lines are all but non-existent to the naked eye.
Resin 3D Printer Types
There are several different types of resin 3D printers. The only one you really need to worry about is the LCD, also known as MSLA, as it’s what the latest iterations of resin printers are using.
But for completionist sake, the primary types are: Stereolithography (SLA), Digital Light Processing (DLP), and Liquid Crystal Display (LCD) (also known as Masked Stereolithography, or MSLA).
The table below contains a brief overview of each, but you don’t need to know the difference to get into printing. I’m only including it for your information. SLA, DLP and LCD resin 3D printers are all very similar – they cure resin and they do so one layer at a time. It’s also worth noting that SLA has slower print times. Skip the table if you don’t care for the technical side.
The Resin Printing Process
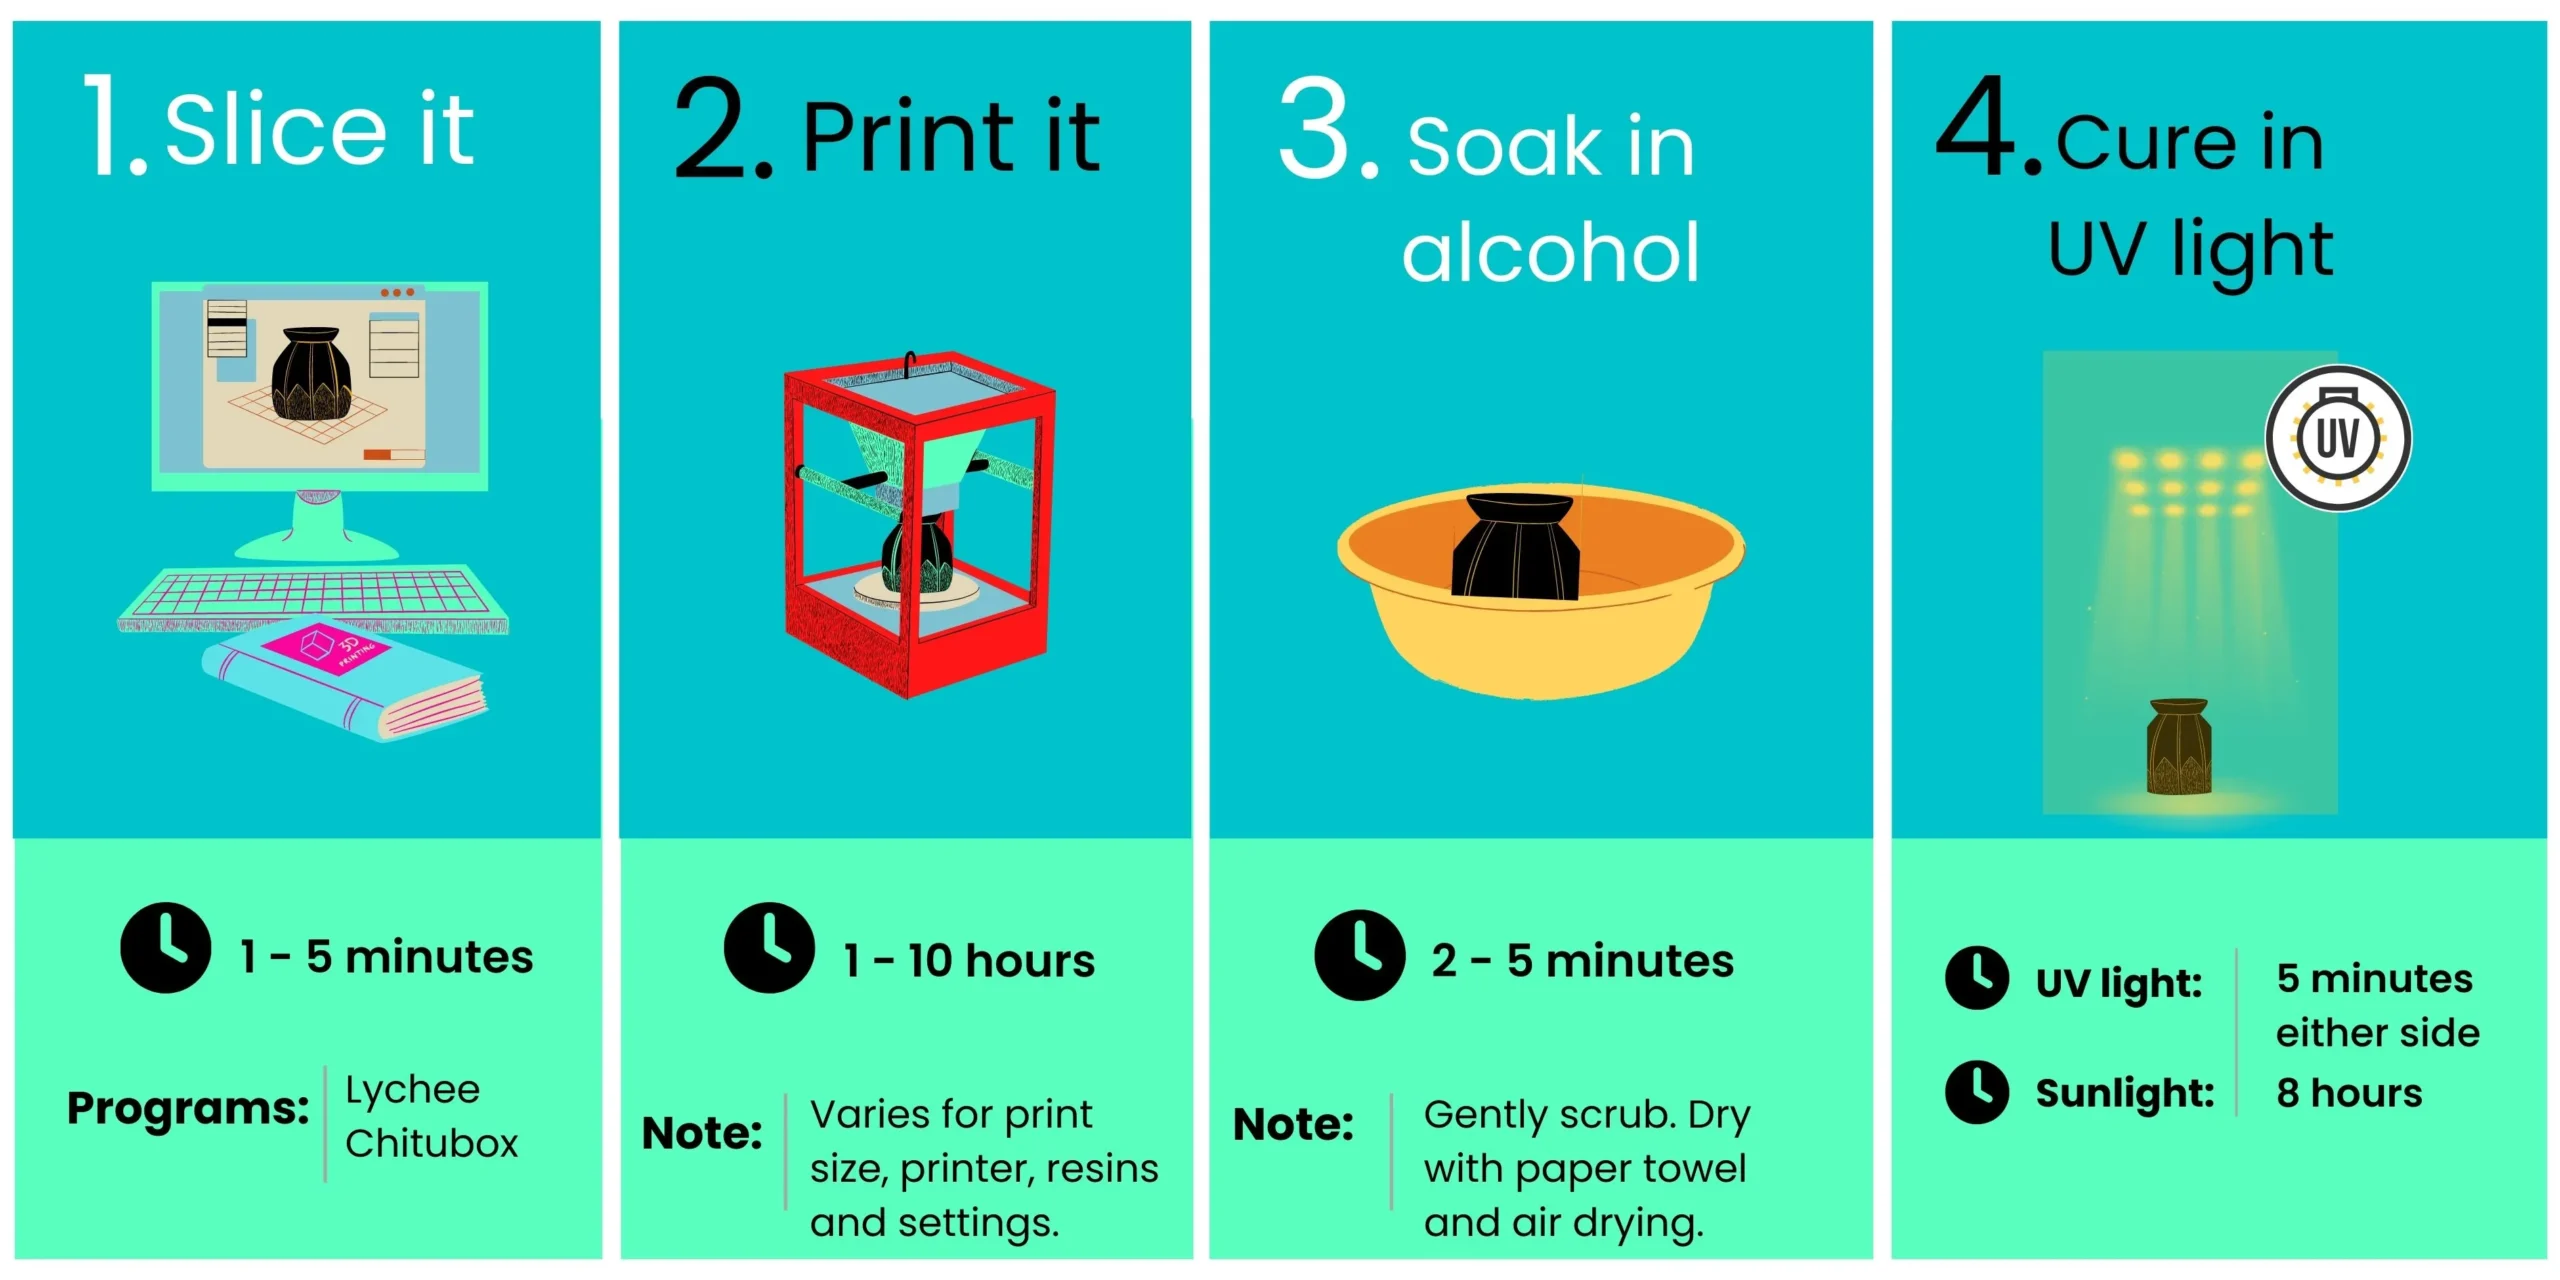
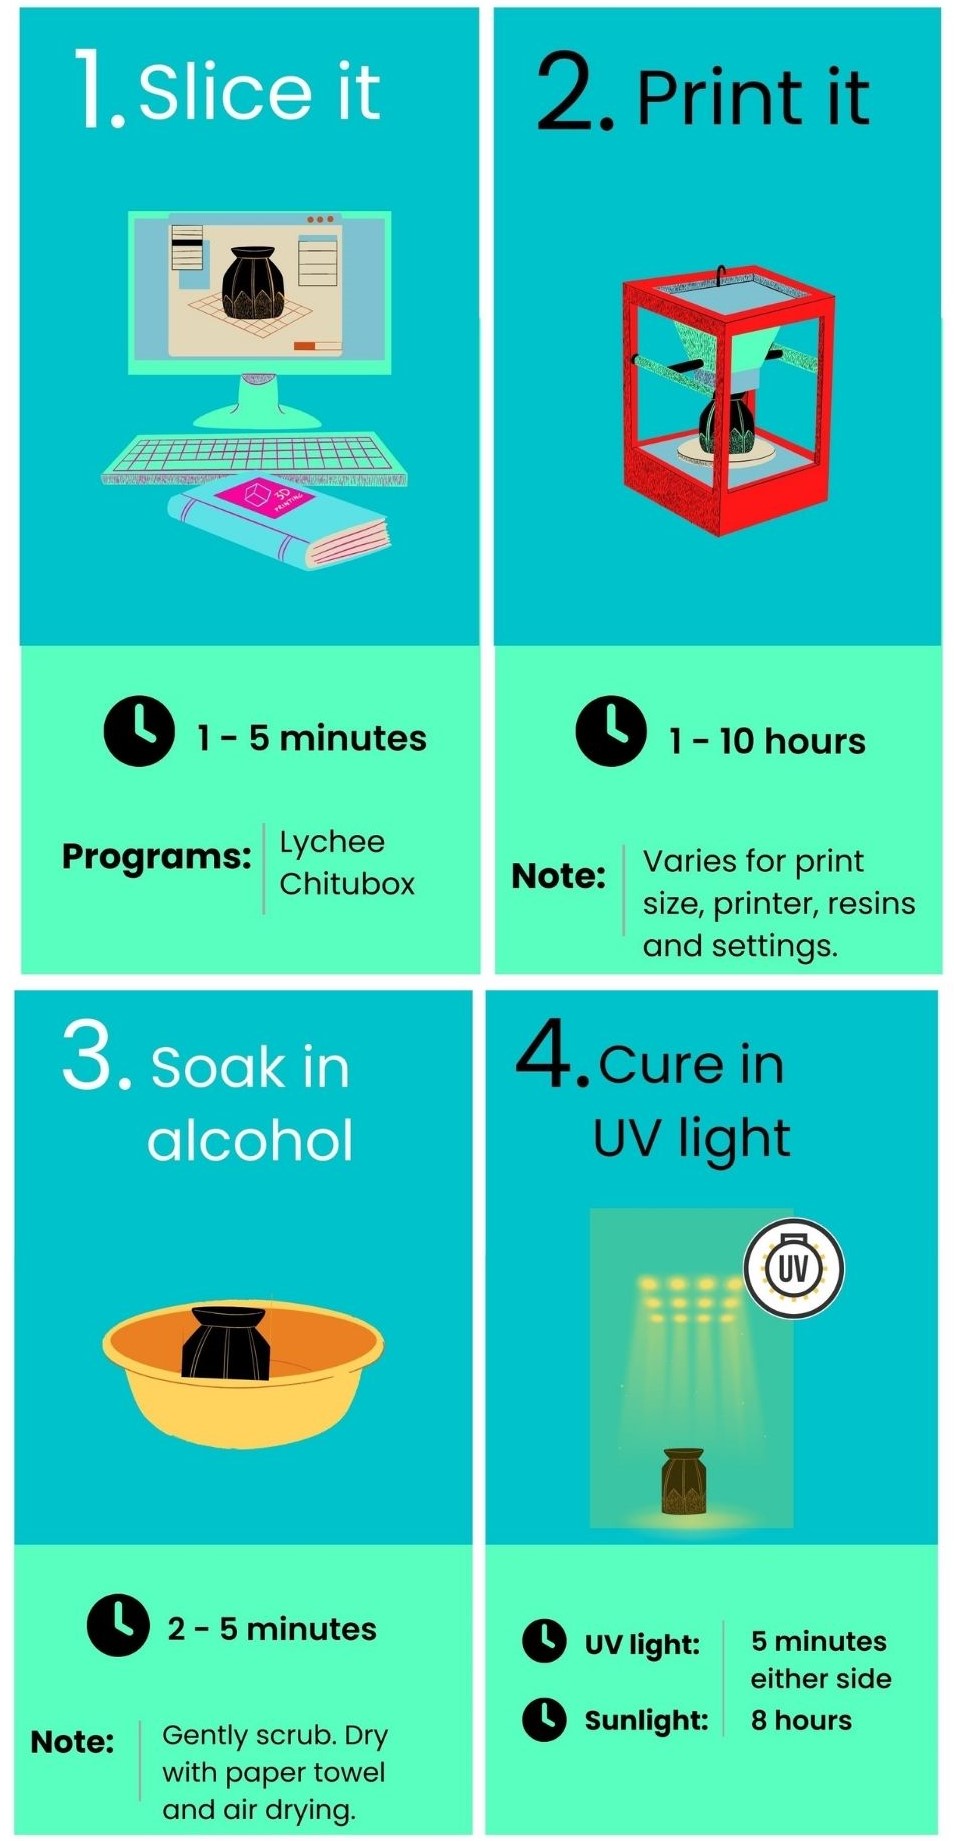
There are a few more steps to printing in resin than there are to printing plastics. For both, you’ll naturally first want to source an STL or other 3D printing file. The process for how to use a resin 3D printer is as follows:
1. You will need to “slice” the file on free software such as Lychee or Chitubox (the software is different for FDMs, but the process is similar). The 3D printing file is loaded into the software, where you can support the file if it doesn’t come pre-supported – don’t worry, there is the option to auto-generate supports! Then simply hit the “slice” button and save the new .ctb file onto a USB.
2. Take the file to your resin 3D printer and hit print – come back in a few hours.
3. The print will then require washing in 99% or higher alcohol. Dab it dry with paper towels and if need be let it air dry.
4. If there are supports, the model will need wrangling free from them, followed by curing in UV light for an additional while before it’s safe and non-toxic to handle.
For alcohol, you’ll want to use as close to 100% as you can get, such as Isopropyl.
For UV light, your options are sunlight (around 8 hours) or artificial UV lights (approximately 5 minutes either side of the model).
If text is not your thing, see the infographic below.
Weighing up Resin vs Filament 3D Printers
This needs its own article, but briefly, resin 3D printers are the clear-cut choice for miniatures, such as models of people or creatures. Their ability to achieve minimal layer heights enable them to print minute details, and the closely fused layers also mean painting or priming models is a dream.
Resin printers also have fewer moving parts than an FDM printer, which can reduce the amount of maintenance required.
Last but not least, a typical resin 3D printer will be quieter than the average FDM printer. The difference is narrowing slightly as models like the Bambu Lab range emerge, but it still remains the rule.
FDM printers tend to be the better choice for printing terrain, vehicles, household parts or other large surface areas. These prints are typically less finely detailed, but more robust. Unlike resin, the standard printing materials also aren’t toxic, so they don’t require the same safety gear, and they don’t require as stringent storage conditions because they are largely unaffected by light or environment (although the filament does need to be kept dry).
There is no clear cut winner, because it all depends on what you’re hoping to print. Personally, I own both kinds of printer to cover all my bases and you might find yourself doing the same later down the track.
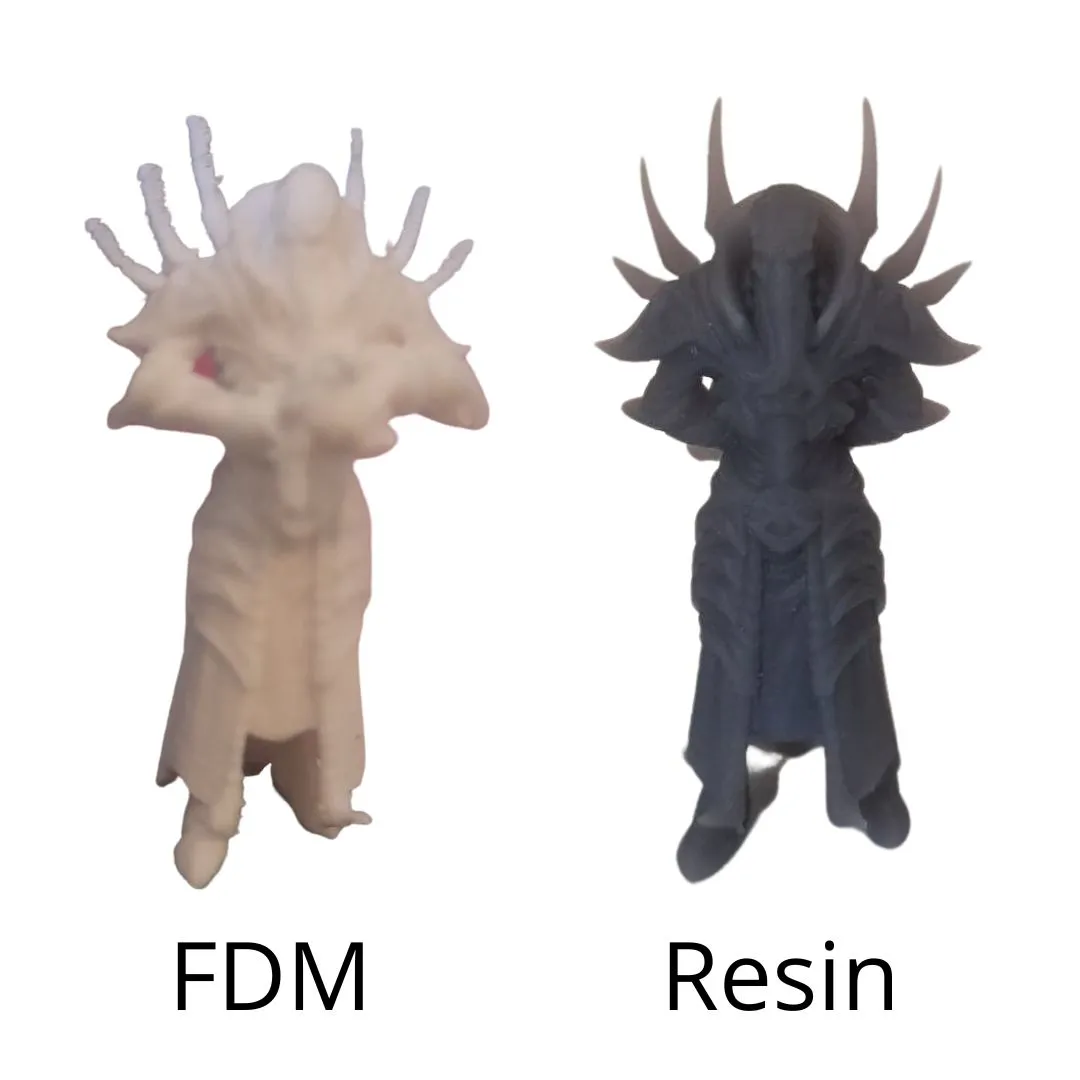
Above are examples of the same batch of models printed in plastic (using an FDM) versus resin (using a resin LCD printer).
But tiny figures aren’t really FDM’s strength. It does fine on larger models, but it’s best suited to more robust, angular prints like terrain, props or vehicles.
Below are some items made to FDM’s strengths.
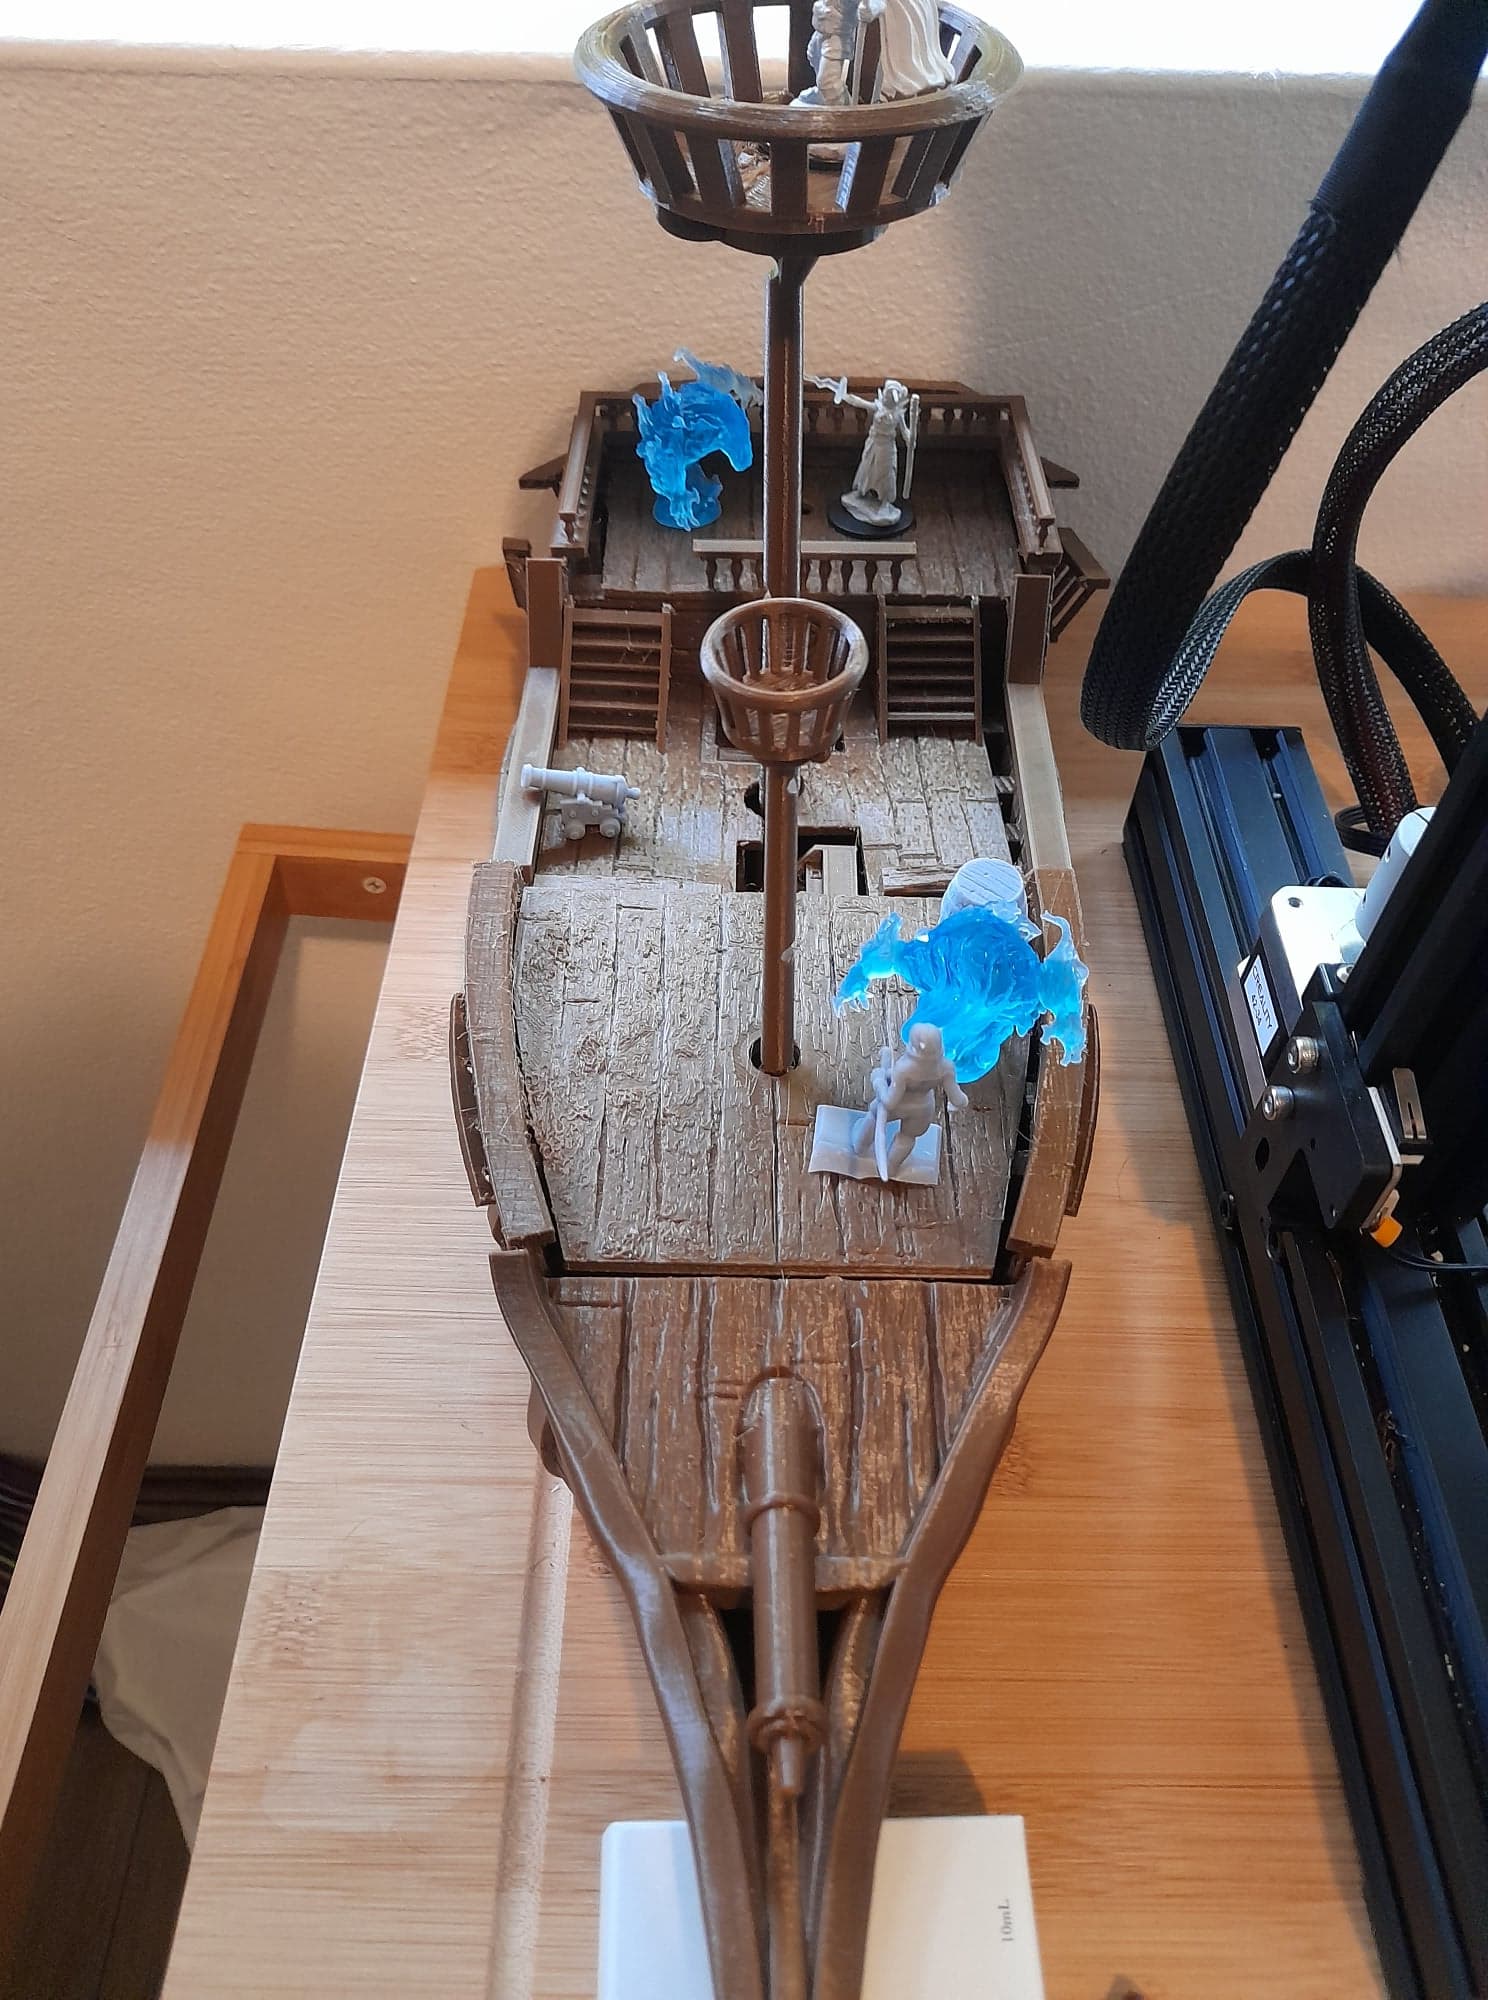
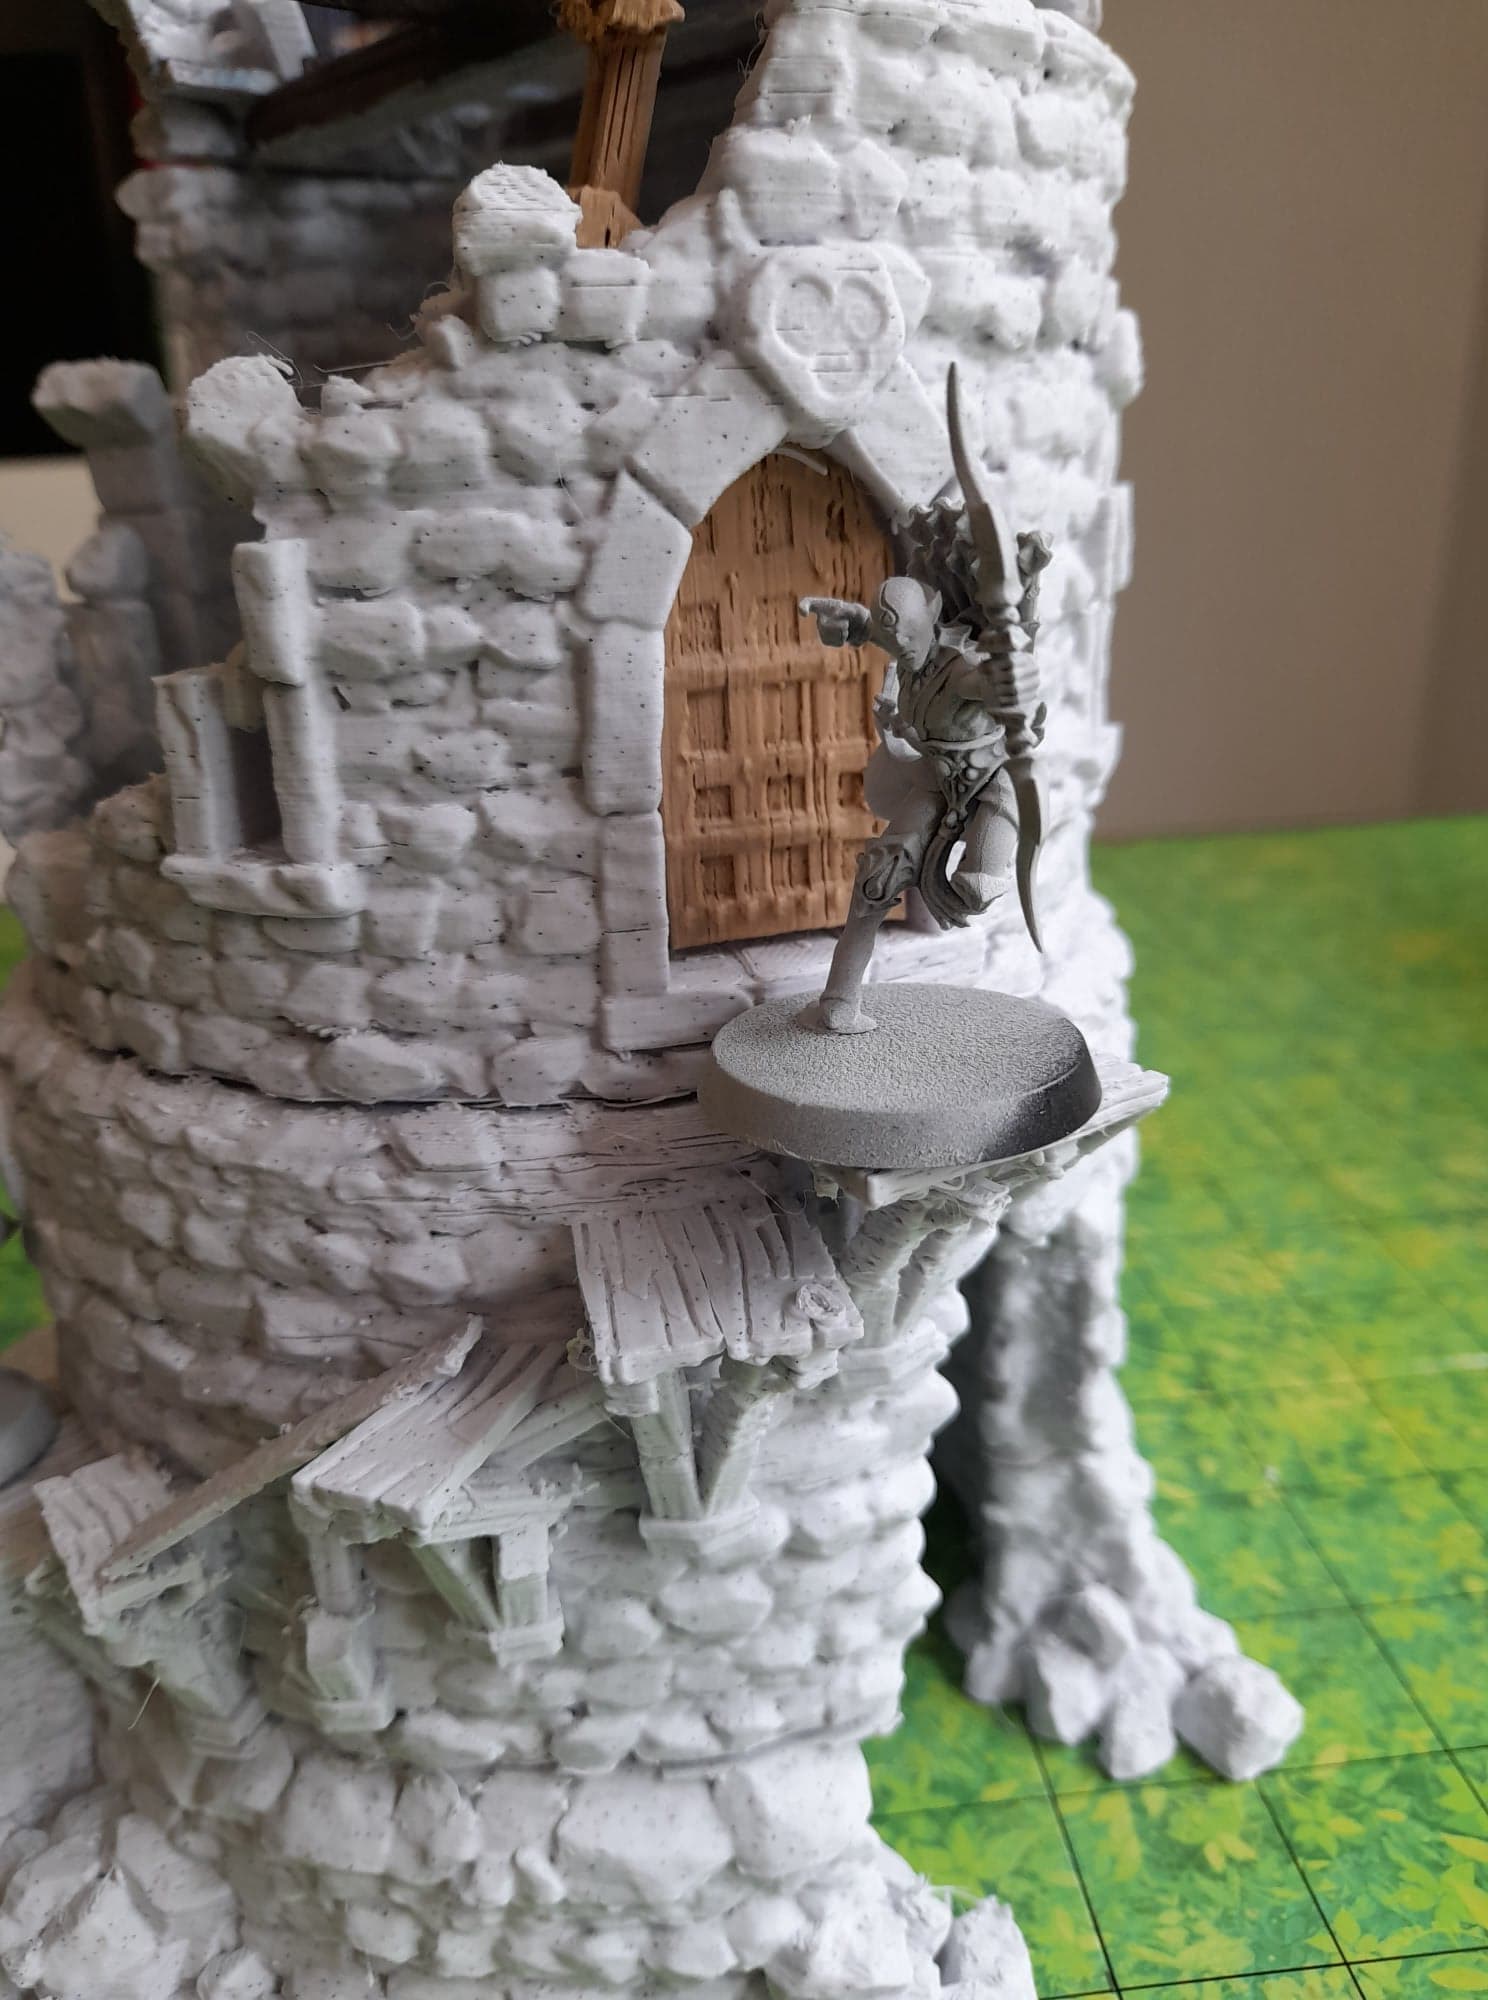
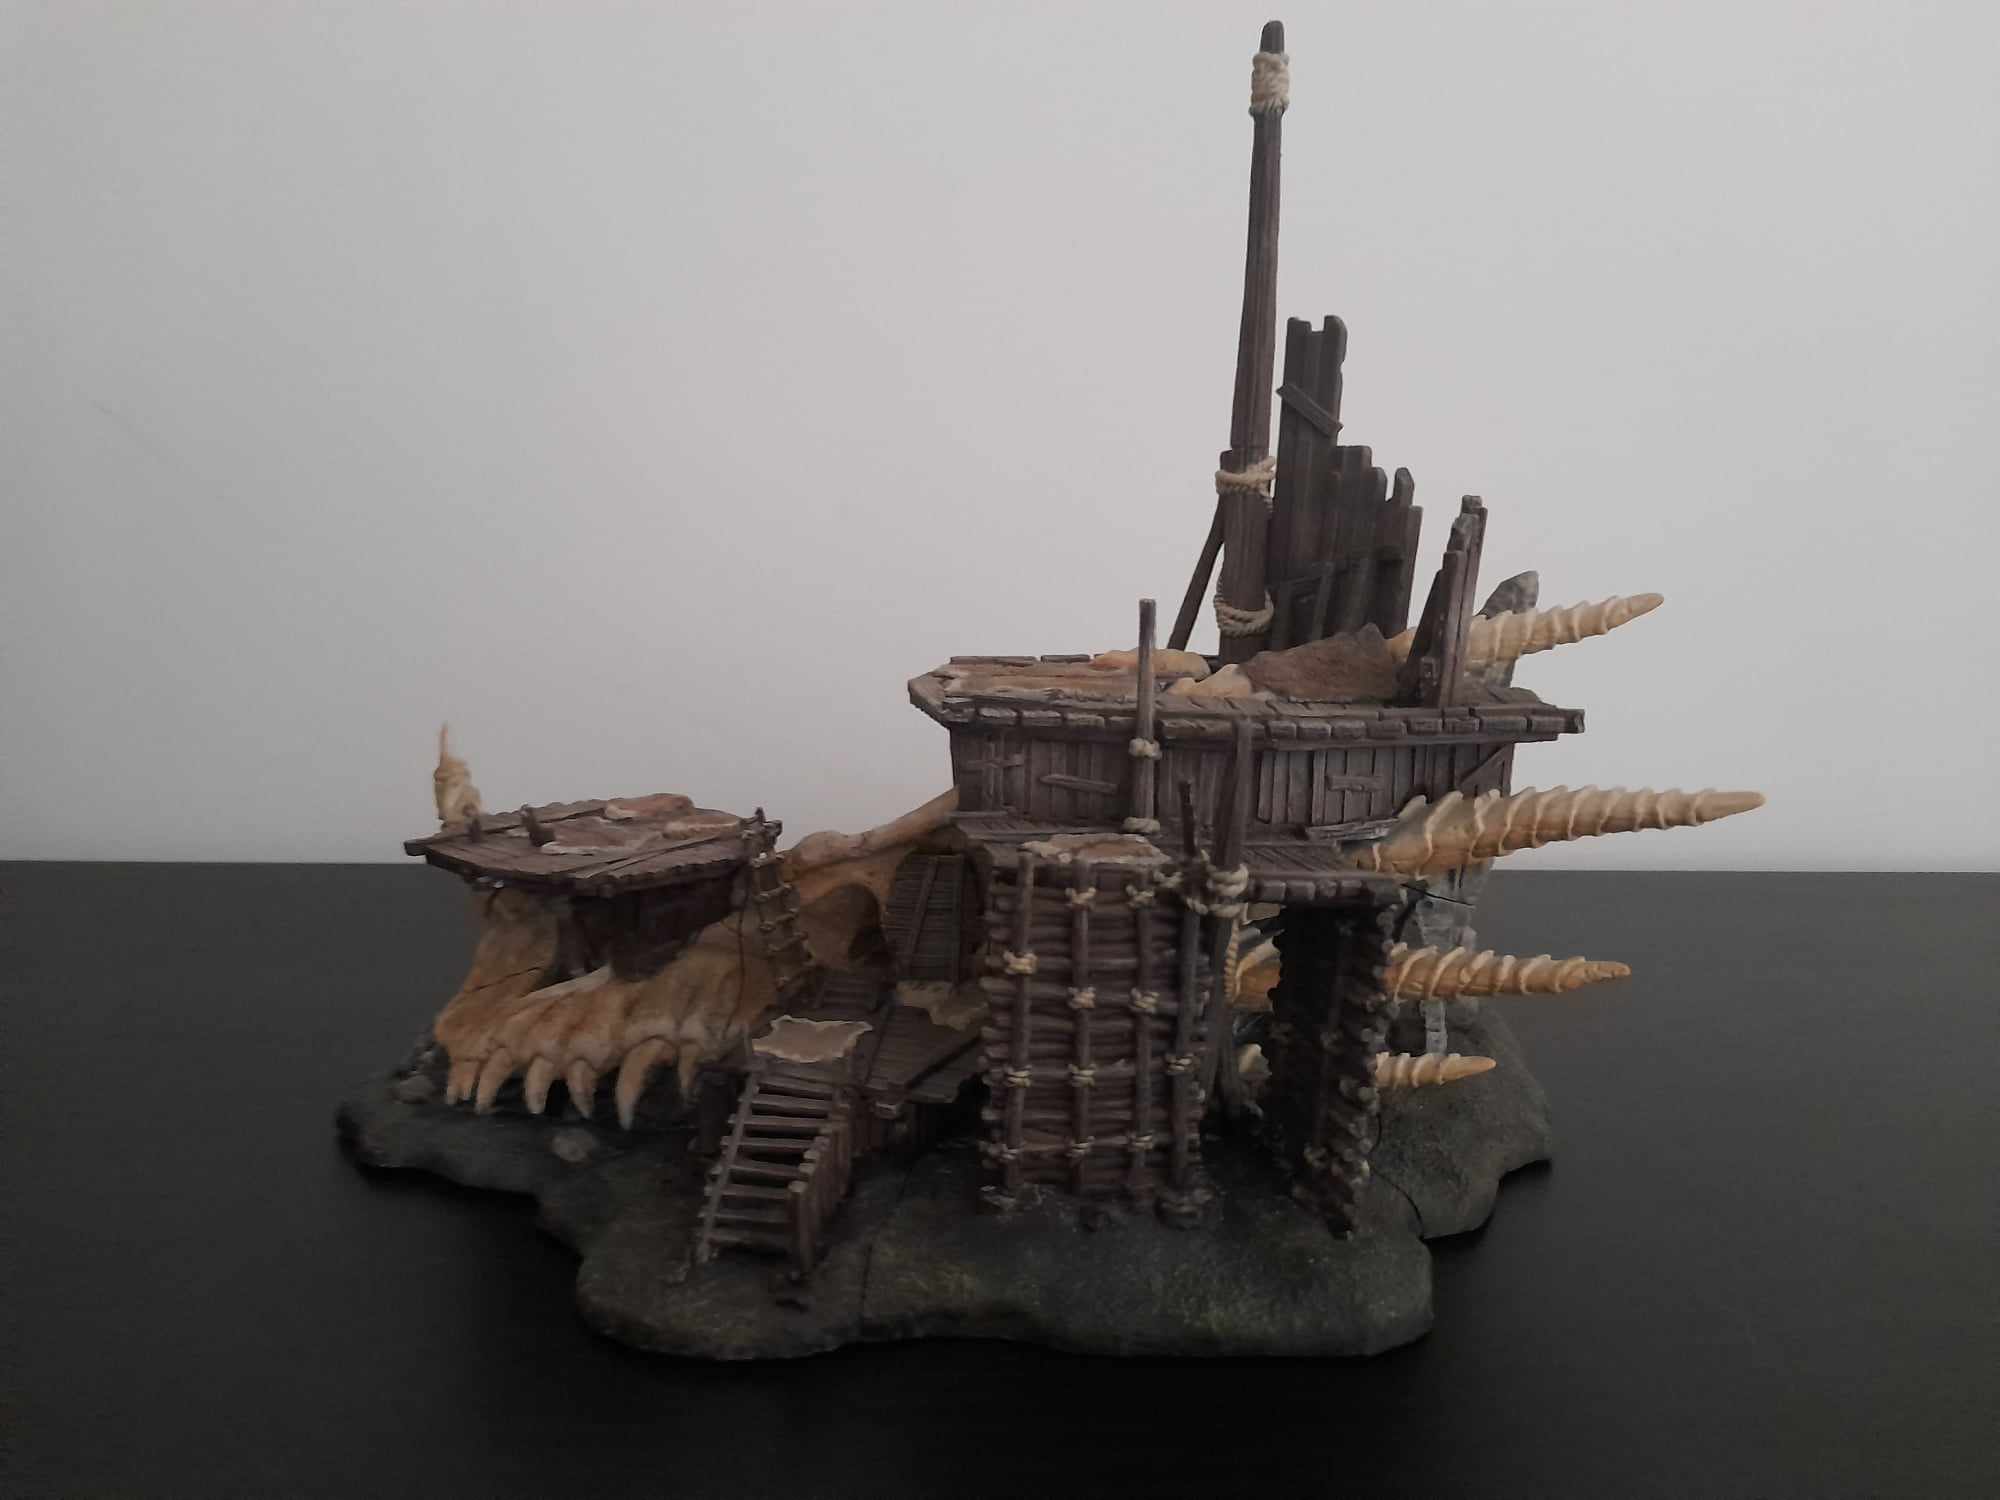
Examples of Resin 3D Prints
See for yourself in the pictures below. Average household resin 3D printers produce incredibly detailed prints. They are leagues above brands such as D&D WizKids miniatures, or Reaper Miniatures, from both a details and paint-ability perspective.
How Much Does a Resin 3D Printer Cost?
A good but small entry-level resin 3D printer in Australia will set you back about AUD $270– $350. While there are certainly more expensive printers with upgrades such as bigger build plates or added features, ultimately and with a bit of research, this price point will net you 90% of the available efficacy for home printers. Stunningly detailed prints, impressive speeds and ease-of-use.
Other Essentials
There are a few additional expenses to resin printing beyond the 3D printer itself. These can be divided into the following three categories.
1. Safety Gear:
Disposable Gloves: The best choice is nitrile so that resin can’t seep through. Do not just use any disposable gloves!
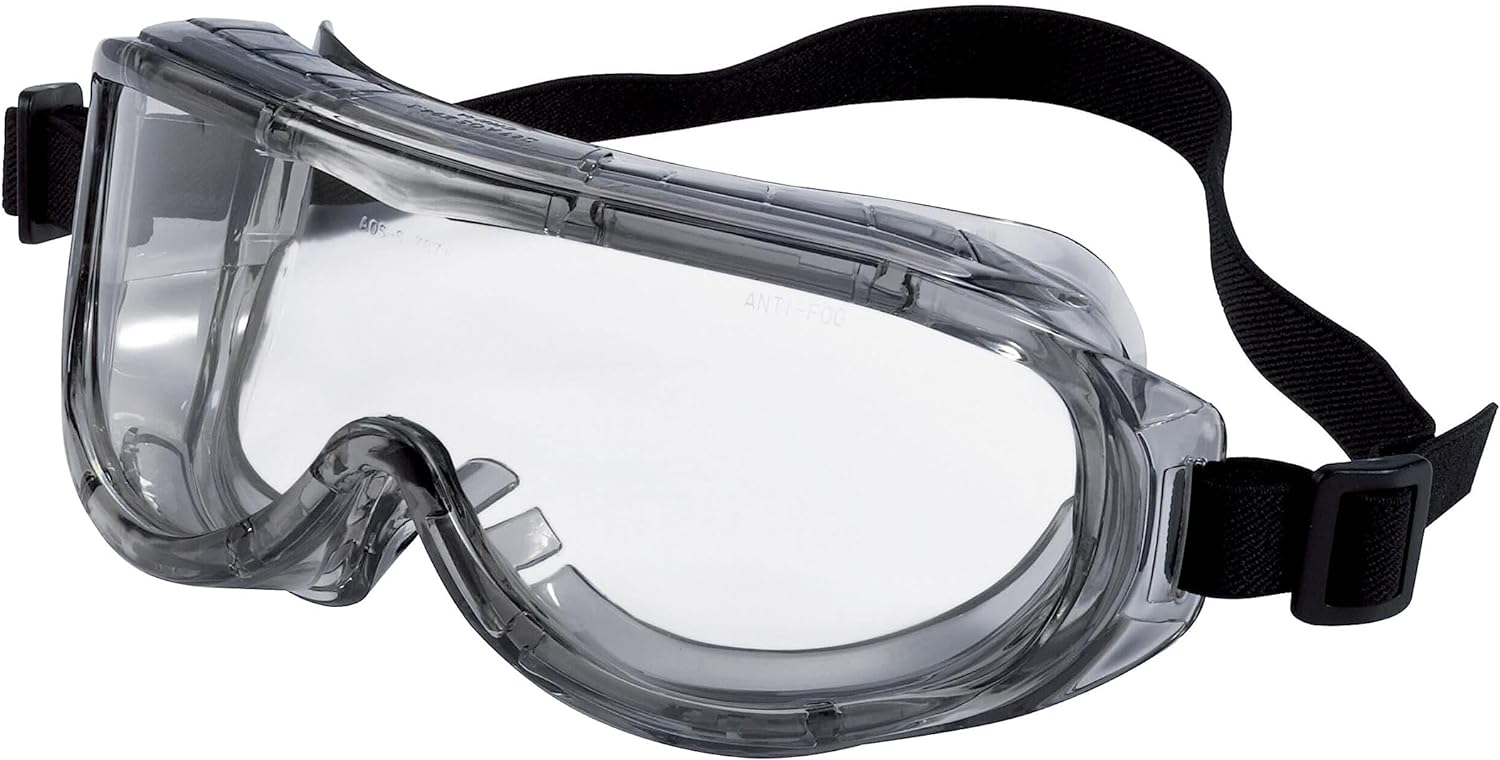
Safety Goggles: These aren’t a strict necessity, but are good practice.
Masks These prevent you inhaling resin fumes. You can get away with using disposable masks, but for superior grade protection you may want to consider a longer-term gas mask. Any 3M respirator will ensure a seal around your face and will filter the air you breathe via cartridges. You can get these at Bunnings, but I’ve included a link to the cheapest option I found on Amazon as well.
2. Consumables:
Many of these will come pre-supplied with your resin 3D printer, but may need replacing over time.
99%+ alcohol: Ideally IsoPropyl Alcohol.
FEP: This refers to the sheet of plastic that forms the bottom of your resin vat. Each FEP can endure several prints before nicks and dent warrant a replacement, and even then, they are very affordable at around $ per pack of 5 on Amazon.
Spatula: A metal spatula will be needed to lever the models gently off the build plate they print onto.
Filter Funnel: A metal funnel with in-built filter, or a plastic funnel with paper filters, will be needed for filtering resin back into the bottle. Straining it is vital to ensure there are no residue bits of solidified resin in the mix, which can damage your printer.
Paper Towels: For clean-up.
LCD/MSLA Printers Only: LCD screen : This is technically a consumable, though one with a generally long lifespan.
And of course:
Resin: Standard resin can cost anywhere between AUD $30 to AUD $60 per bottle. There are a wide range of resin types to consider, from transparent, to plant-based eco-friendly resins, to other colours and qualities.
Resin is its own topic entirely – one I’ll delve into in the near future!
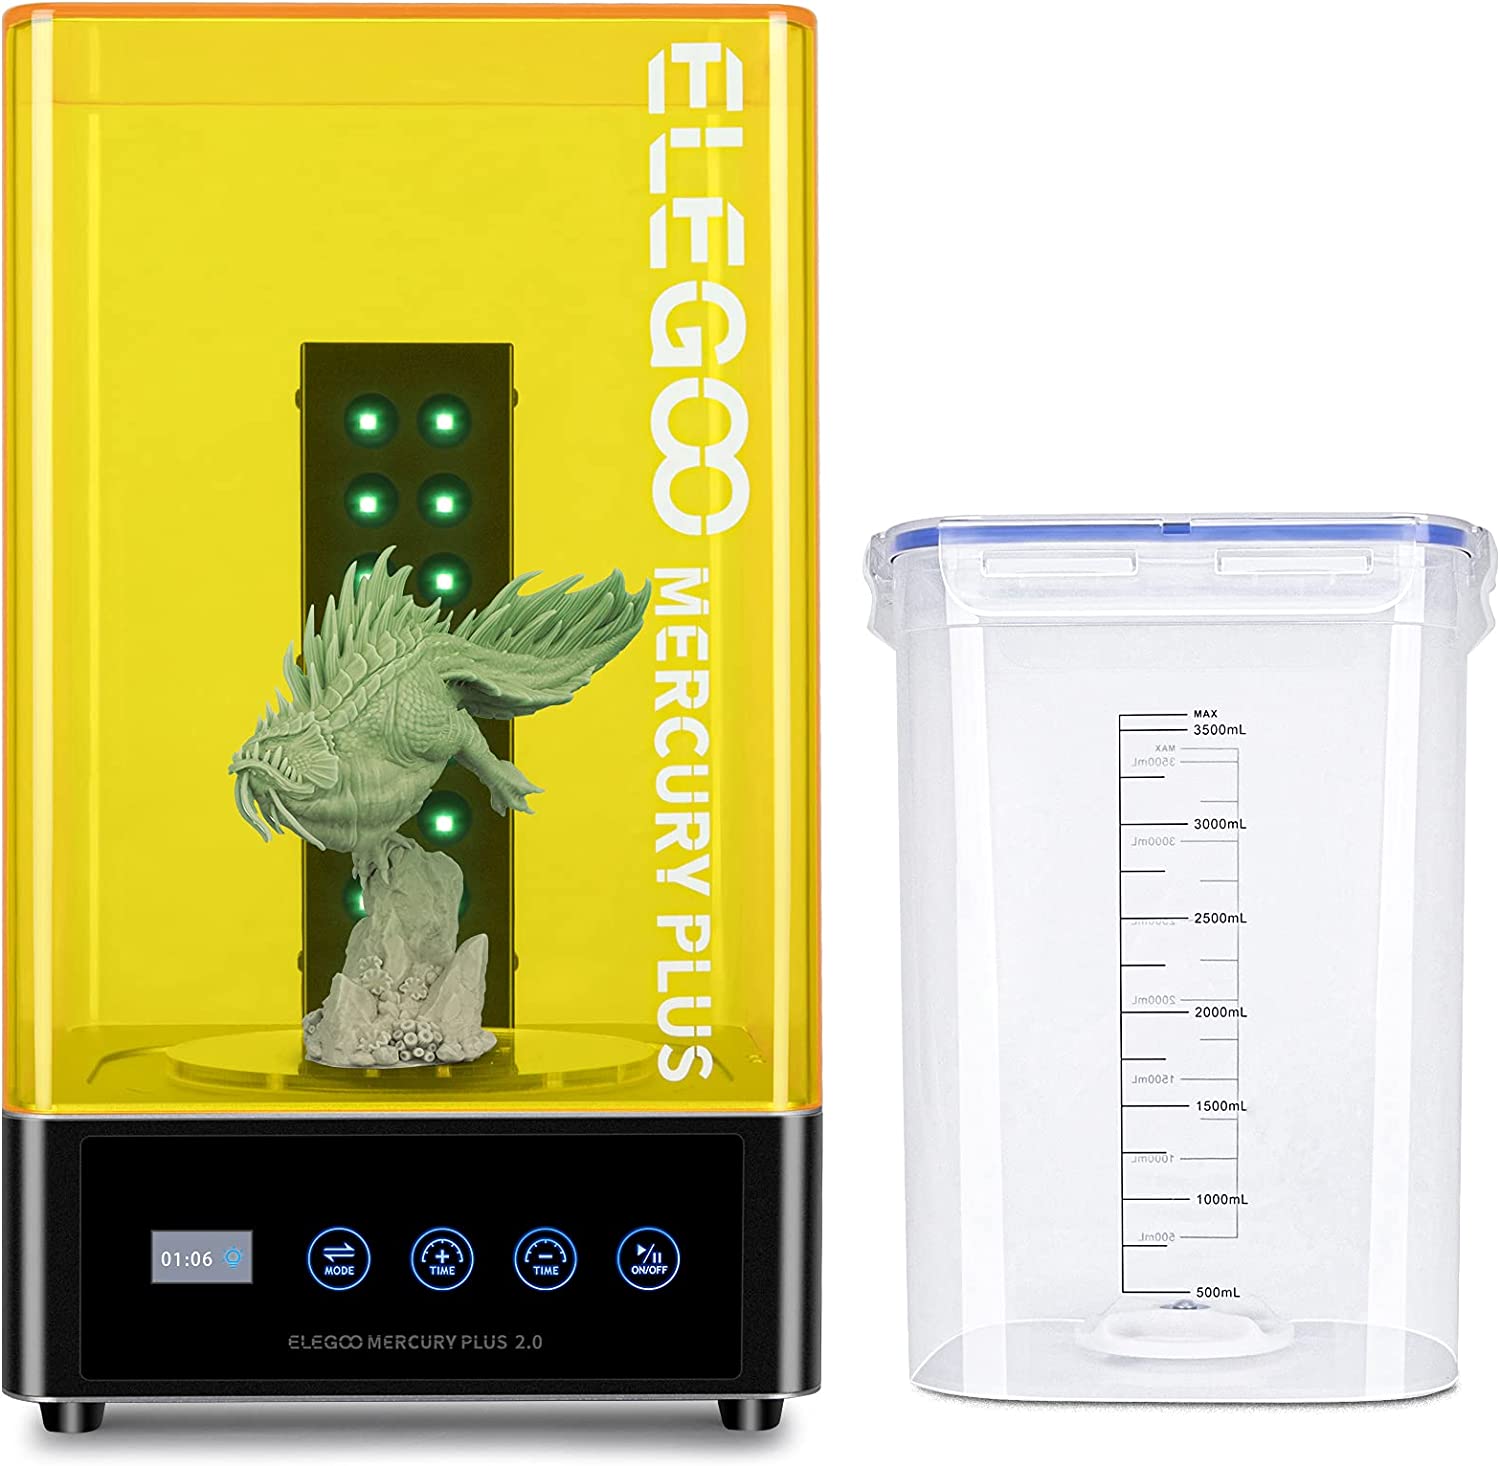
3. Curing Station:
Once printed, resin 3D prints require a few additional steps to ensure they’re safe to handle. They will need to be washed in alcohol and then cured in UV light one final time – the process is quick once you have your system in place. I’ve created an easy checklist diagram which you can find here as an easy reference.
To cure your model once it’s printed, you will need to place it in UV light one more time. There are two sources at your disposal: natural sunlight or artificial UV light. You can DIY your own, or purchase a more official UV curing station from 3D printer makers such as Elegoo or Anycubic.
Sunlight:
Imperfect and less consistent or available
You should leave your models to bake in the sun for at least 8 hours before you touch them
Nail polish curing stations or other UV lights:
The DIY option, which is a subject on its own entirely.
Official curing stations:
The combination curing and washing stations available are honestly, in my opinion, worth the extra investment. As you get into 3D printing, you’ll quickly find your printing station expand as extra bits take up space. Curing and wash stations are compact ways to both cure your models and dunk them in alcohol.
Try to match the brand of printer with the brand of curing station if you can. So if you have an Elegoo Mars, get an Elegoo curing station, and if you have an Anycubic Photon, grab the Anycubic station. While largely interchangeable, the building plate can sometimes be fit directly into the wash station more easily if the brands match.
Beginner’s ‘Bare Minimum’ Shopping Cart Overview:

1. Resin
This is the material the printer uses. Elegoo linked via Amazon below, eBay however tends to stock the Anycubic range which can be more affordable. Newer resins such as the 8K ones boast better quality and easier curing, but older resins are just as good. (P.S. you don’t need to match resin printer brands to the brands of resin).
Standard Elegoo resin:
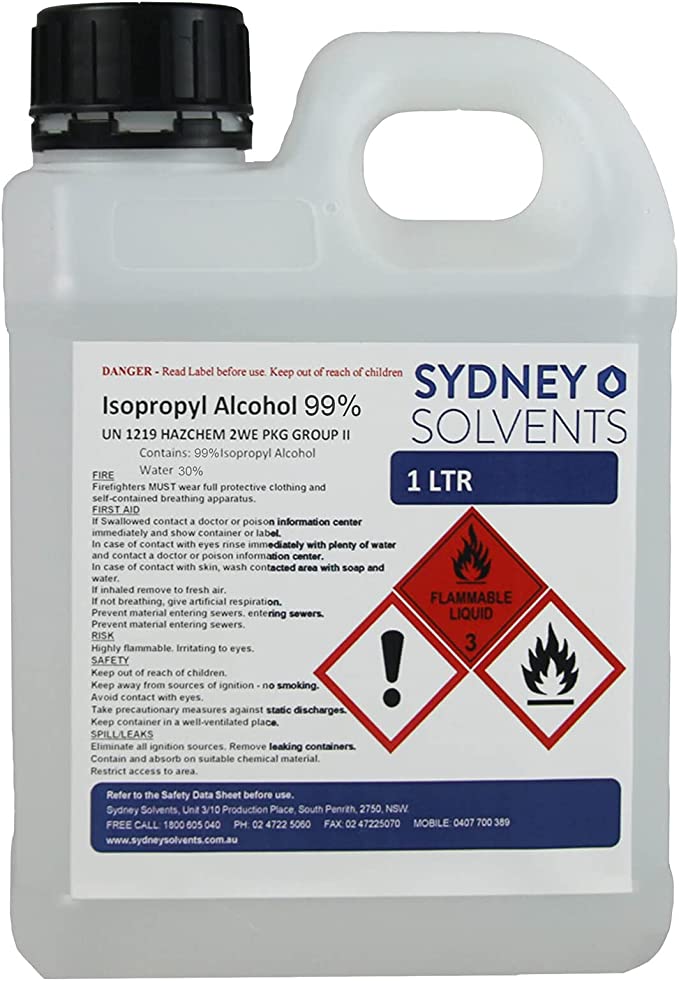
2. IsoPropyl Alcohol (IPA)
You need this to clean your resin prints once they’re finished printing. I use Sydney Solvents, they ship in large quantities Australia-wide. Shipping is expensive due to its nature, so in future try order it in bulk.
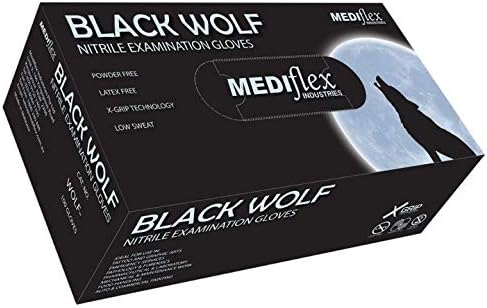
3. Nitrile Gloves
Don’t use just any gloves – the type you want is called nitrile gloves as they are resistant to resin. Do not touch resin or recent prints directly. If any gets on your skin, wipe it off. Small slips you wipe away are just fine, but willful negligence can burn your skin.
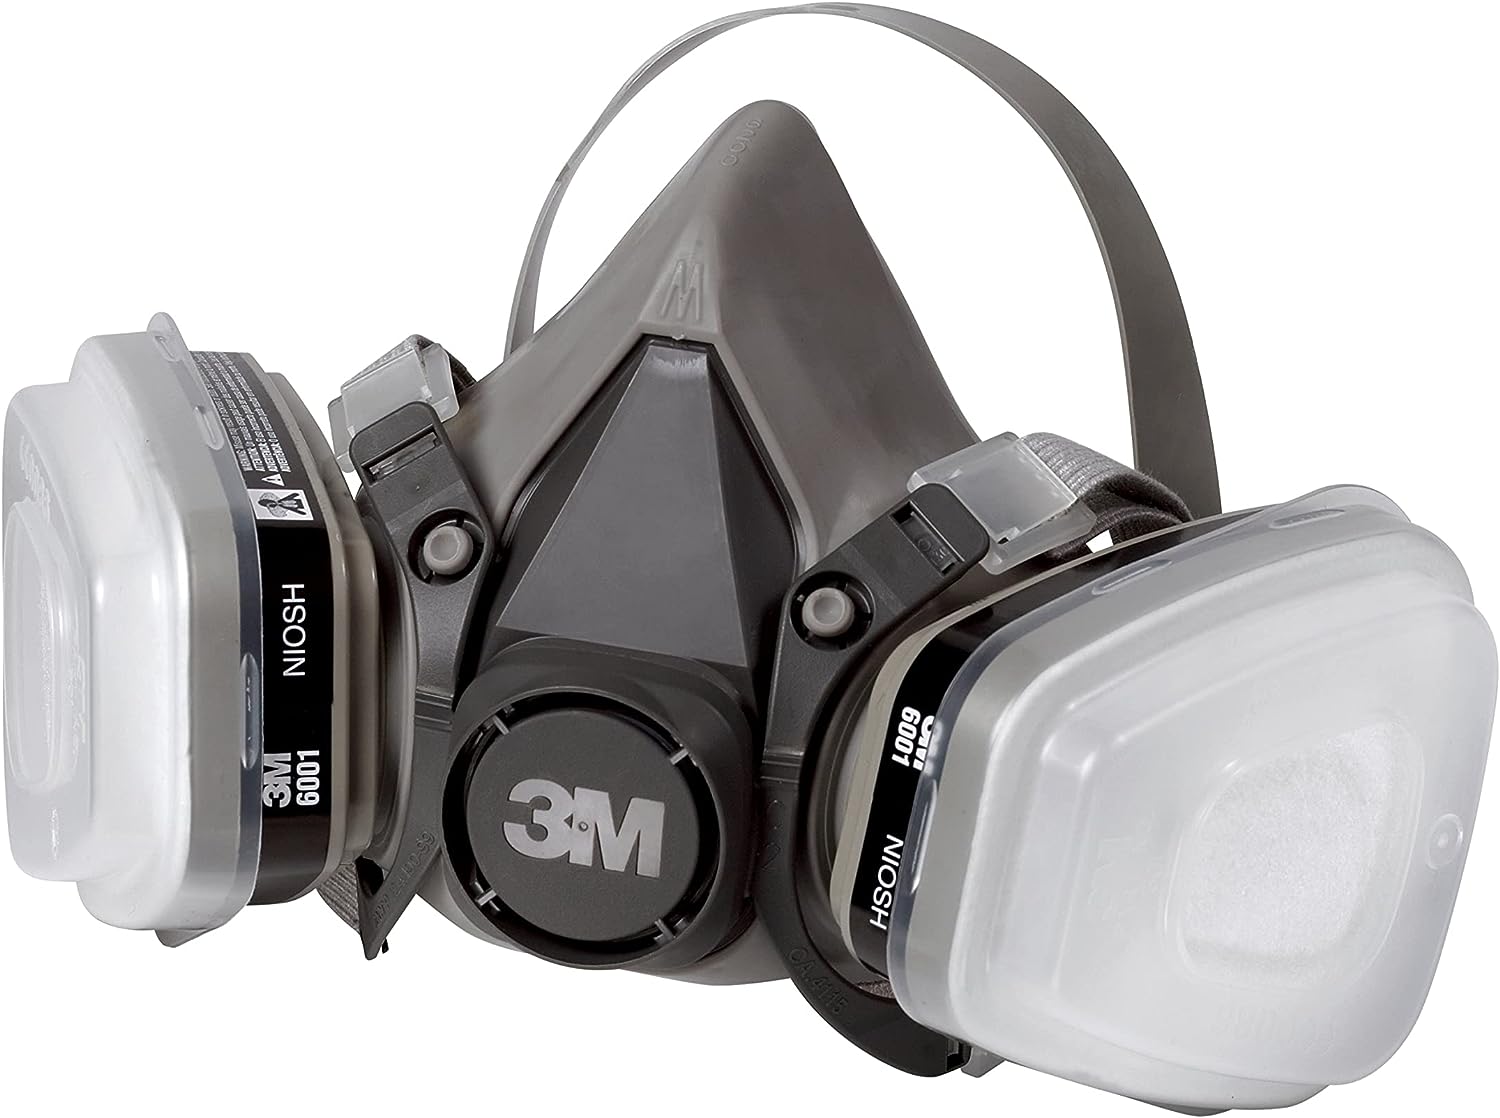
4. Mask
You shouldn’t breathe in resin. I must be honest, I don’t always use mine, but you really should. Masks left over from the Covid era can work too. The mask I’ve linked is one I own and is among the safest kinds you can use, especially if you are weak in the respiratory area.
5. Goggles
Resin in your eyes is a no-go. Be careful when touching resin that you don’t then touch your eyes. Again, this is a piece of equipment I have to include for beginners, even though I myself am guilty of only using them on occasion.
Optional add-ons: Quality of life improvements
Optional: Curing Station
You’ll need UV light to cure your resin prints. You can use sunlight to spare money in the beginning, but that takes much longer and is more work. I highly recommend you add a curing station to your cart, and if not, at least to your wish list.
Entry-level printers:

Budget-Pick
Elegoo Mars 5:
Roughly AUD $399
My first resin printer was its predecessor, the Mars 2. The Mars 5 has everything a beginner will need for stunning detailed prints. However if you think you’ll want to print bigger models, lots of models at once, or things like terrain, I would rather save up and get a larger printer like the Elegoo Saturn from the start. See below.

Phrozen Sonic Mini 8K S:
Roughly AUD $450
With an easy setup and user-friendly operation, the Sonic Mini 8K S is specifically designed for entry-level users eager to begin their 3D printing journey while achieving professional-grade results.

Top Pick
Elegoo Saturn 4:
Roughly AUD $730
You can save a bit of money on the older Saturn models such as 3, if you can find any. It’s still 10-inches. That said, the 4 actually has some amazing upgrades over 3, such as Smart Automatic Leveling and AI Print Monitoring.

Elegoo Saturn 4 Ultra:
Roughly AUD $899- $1050
Maybe you’re a madman or woman. I don’t know you. If you want to go all in from the outset, you could consider upgrading to the Elegoo Saturn Ultra. It boasts 16K – which I’m fairly confident won’t matter to the human eye. However, it does have twice the print speed as the base Saturn 4, smart tank heating system that maintains resin at optimal temperature and may reduce failures, and has an AI camera that lets you view time-lapse videos of your prints which is plain sick.
Saturn 4 Ultra:
Saturn 4 Ultra+ (don’t ask):
Free Software Needed For Resin Printers
You will need slicing software to print your 3D files. Thankfully, these are freely available. The top contenders are ChituBox or Lychee. Either is a good choice. Lychee is probably more user-friendly overall, but makes you wait 20 seconds between prints to play advertisements unless you switch to a paid version.
Both are equally as capable of getting the job done, and both can automatically support models for you.
3D Printing Files for Resin Printers
The most common file type is called an STL. These generally get loaded onto a USB or other transferable device, then plugged directly into the 3D printer. In some cases, you may be able to plug in your laptop directly or transfer wirelessly, but these are generally regarded to have drawbacks.
Worth noting, you can print the same 3D print files on both resin and FDM printers. However, the supports for each will be entirely different.
Finding 3D Printing Files
Several file hosting sites exist, including Thingiverse, Cults 3D and MyMiniFactory. Yeggi is a site that pulls 3D print files from across the web. Patreon and MyMiniFactory’s Tribes also host plenty of 3D artists, most of whom rotate a monthly pack of 3D printing files for a nominal fee ranging between AUD $10 to $20 per month on average.
If you’re worrying about finding files to print, don’t be. There is a massive, rapidly growing community of artists for just about everything – tabletop games, miniatures, spare parts, vehicle parts, jewellery, fashion, props and cosplay, board games and more. You just have to know where to find them.
Is Resin Safe?
Generally yes, if you use the correct gear. Resin is toxic, and this poses a few considerations you will most definitely need to keep in mind when deciding whether you can safely operate this type of printer in your home. The primary safety aspects to keep in mind are as follows:
- You should never handle resin directly or let it touch your skin. You will need to wear gloves at all times.
- You shouldn’t breathe resin fumes in – this will mean keeping the resin 3D printer some place that is well-ventilated and away from people or pets. It will also mean wearing a mask while you’re working with your printer.
- Negligent disposal of resin is harmful to the environment. For this reason, you’ll have to learn how to dispose of resin appropriately, or choose less toxic, plant-based alternatives to traditional resin.
If you get resin on your skin and you wipe it off swiftly, generally speaking it’s not an issue. But if you handle resin for extended periods, it can result in a nasty, caustic burn. In large quantities, resin is toxic to people and animals.
If you’re concerned, look out for plant-based resin, which is biodegradable, BPA-free, and ecologically friendly. While you should still aim not to touch or inhale it, the risk is far more negligible.
Storing Resin 3D Printers
Unlike FDM printers, resin 3D printers require certain storage conditions. Due to their use of UV light to solidify models, their environment needs to be dark, with limited to no sunlight. This will ideally be some place without much natural lighting, such as a garage.
That said, resin also creates harmful fumes that should not be breathed in. For this reason, its environment also needs to be ventilated.
This can sometimes make it more difficult to fit resin printers into your living arrangement. There are covers available to help limit exposure to sunlight.
Disposing of Resin
If it’s cured in alcohol and UV light, you can throw standard resin away the normal way. For liquid resin or uncured resin you no longer want, you’ll have to take it to your local waste location to ensure no harm comes to the environment. Here’s a complete guide on how to dispose of resin.
The Best Resin 3D Printers in Australia: Know Your Brands
There are several excellent brands of resin 3D printers available for household use these days, each with their own extensive list of pros and cons depending on what you’re hoping to print, but few you can really “go wrong” with. The most popular brands of resin 3D printers in Australia are Elegoo, Phrozen and Anycubic. These names are trusted because, generally speaking, they are reliable and they have an active community online who can assist you with any problems you may encounter along the way. If your printer is under warranty, and sometimes even if it isn’t, these big brand names will happily send you a replacement part free of charge for events outside of user-error.
They are also on the more affordable end of the spectrum without compromising much on quality. I heartily recommend you start your printing journey with an Elegoo printer rather than kicking things off with a more advanced or expensive machine, or enviable brands such as Bambu Lab. The advantages of these machines are probably minimal to a beginner, and only once you dip your feet into the hobby will you understand which advanced features even matter to you.
For the purposes of getting high-quality prints, Elegoo and Anycubic offer fantastic grade options. You can’t go wrong with either, but in general, Elegoo comes more recommended for their praised customer support.
Another brand I am personally less experienced with but have heard are reputable includes Voxelab.
The Best Resin 3D Printer for Beginners
I started with Elegoo as my first resin 3D printer, and had an excellent experience. So much so that I bought friends and family their own Elegoo printers when they were looking to get into the hobby. Not only are they popular and reliable, but their customer service team is excellent, reducing the risk you struggle on your way into the hobby and are left on your own. (That said, if you’ve had a positive or negative experience with a 3D printing manufacturer, please leave your feedback here for me. I am assembling the community’s vote to help guide users and keep holding manufacturers to account).
99% pre-assembled, the Elegoo Mars is the definition of plug-and-play and produces some of the most visually stunning prints even at diminutive scales such as 25mm miniatures. I recommend it to all beginners.
That said, if you think you might want to print larger models whole or several smaller models at once (such as entire armies for a certain tabletop game) then you may want to consider the Mars’ larger iteration – the Elegoo Saturn.
FAQ
How Tech-Savvy Do You Need to be to Operate a Resin 3D Printer?
Resin printers may have more aspects to grasp surrounding how to interact safely with resin, but the machines themselves are as close to plug and play as you can get, especially now that auto-levelling has arrived.
Now days you have about 5 minutes between your printer arriving and hitting print – with the only barrier being learning what you’re doing. There may be issues here or there that require troubleshooting, but most issues are fairly well documented and easily resolved either through online communities or by reaching out to the manufacturer.
There are also some minor software components, such as using a program to prepare your files for printing, but these are once again intuitive and have a very low learning curve. Here’s my guide to printing your first resin model.
What Is the Time-Investment to Learn Resin 3D Printing?
Unlike some FDM printers, assembly is minimal and printing files is as easy as plugging in your USB. However, you’ll need to take the time to understand the basics of how to get a successful print, from preparing your printer to preparing your print files.
All up, I would describe the resin 3D printer learning curve as “ongoing, but not steep”. Be prepared to run into the odd issue and have to do some Googling to resolve the problem. Be prepared to learn how to level your 3D printer bed before you hit print. Be prepared to learn the fundamentals of using printing software and making sure your model is supported (though you can buy pre-supported files or automatically support them in most programs).
It won’t require hundreds of hours, but it could easily take anywhere from 2 hours to 6 hours to absorb enough to be ready to hit print on your new resin machine.
How Much Is 3D Printer Resin?
The price has come down significantly over the years. You can get quality resins from some of the biggest manufacturers for between AUD $30 – $60 per 1KG bottle. This includes ABS-like, transparent and translucent resins. Premium resins will of course cost slightly more, such as the Siraya Tech resins which cost around AUD $75 per 1 KG bottle.
How Much Resin Do I Need?
It will vary depending on the scale of the models you’re printing, and whether they are hollow or solid. The mileage of the standard 1 KG resin bottle is generally excellent if you’re planning to print several tabletop, 25mm-scale miniatures, such as for TTRPGs like D&D. If you’re printing terrain or bigger models such as busts or 75mm scales for display, then you might be looking at spending a quarter of a bottle per print.
On average, a 25mm miniature such as the one below will cost you about AUD $0.50-$1.

Image 1: Approx. $1.00

Image 2: Approx. $10.00